QUICK NOTE: To buy any product reviewed below, click on the Buy Now button to go directly to the appropriate page on another secure site to get more information on that product and/or make a purchase. The “Bob’s Pick” logo below indicates which of the products below has earned Bob Gillespies highest purchase recommendation. Below the reviews is a SIDE-BY-SIDE COMPARISON CHART and, finally, an article by Bob Gillespie on important features to consider when shopping and why.
BOSCH DDH181-01 1/2″ CORDLESS DRILL
This drill comes with two Bosch “Fat Pack” 18V 3.0 AH batteries. It is compatible with any Bosch 18V battery. The included 30 Min. Lithium Ion charger insures that you will never run out of batteries during a job. Also included is a 360-degree side handle for better control and a carrying case. The drill is powered by a newly designed 4-pole motor and features a new patented gear train and clutch. The drill’s ergonomic design makes it very comfortable in the hand.
DEWALT DCD940KX XRP(TM) 1/2” CORDLESS DRILL
Dewalt claims that its XRP Batteries have a 40% greater run-time than standard cordless drill batteries as well as longer life. It further states that the motor delivers 450 UWO (Unit Watts Out) of max power for superior performance. A patented 3-speed, all-metal transmission matches the drill to the job at hand for correct speed and better battery run-time. The half-inch ratcheting chuck keeps drill bits from slipping out. The package includes the drill, a 360-degree slide handle, (2) 18 Volt XRP batteries, a one-hour charger and a kit box.
MAKITA BDF451 LTT LITHIUM ION 1/2″ CORDLESS DRILL
Makita has developed an LXT series of cordless tools that can delver the power of an 18 volt cordless drill with a tool weight of a 12 volt cordless drill. This drill is one of them. Part of the secret of this lightweight power is a Makita-built 2-part motor that delivers 560 Inch-pounds of torque in a tool that weighs just 4.6 Lbs. The Lithium Ion batteries made for this drill deliver 5-times lower self-discharge for use any time and 16 firm holding contact terminals for constant high power. The brushes on this cordless drill are externally accessible for easy changing. Three speed ranges mean this drill will always be perfectly suited to the job.
Two built-in LED lights illuminate your drilling location clearly even in the dark. A 45 minute charger is included which features a built-in fan to keep your batteries cool while they are charging. A chip is built into each battery that communicates with an on-board chip in the Optimum Charger during the entire charging process. Included in the package is the cordless drill, (2) batteries, the cordless drill battery charger, screwdriver bits, a carrying case and an operators manual.
MILWAUKEE MILN2610-24 18 VOLT M-18 CORDLESS DRILL
This cordless rill is one of a new M-18 Series of cordless tools being sold by Milwaukee. As such, it delivers more power, more run-time and better ergonomics than previously available. The Milwaukee 4-pole frameless motor delivers 650 Inch-pounds of torque to handle just about any job thrown at it. At only 9 1/4″ long, this compact performer weighs 5.3 Lbs.
The single-sleeve metal chuck has carbide jaws for a better grip on your drill bits. Also included are a battery fuel gauge and an LED light. Included in the kit are the drill, 2 batteries, a charger, side handle and a carrying case.
PORTER CABLE PCL180DRK-2 LITHIUM ION CORDLESS DRILL
With an overall length of only 8 1/2″, the Porter Cable contender fits into tight spaces and weighs only 3.8 Lbs. It has two speed ranges and a single sleeve chuck. The included 30-minute cordless drill battery charger means quick recovery for the included lithium batteries. An LED light is included. The kit contains the cordless drill, 2 batteries, the charger, a double-ended bit tip and a soft-sided carrying case.
RIDGID ZRR86014 18V RECONDITIONED CORDLESS DRILL
The two-speed Autoshift transmission on this cordless drill shifts between two speed ranges (0-450 and 0-1450 RPM) automatically as the need arises, eliminating the need to shift the gears manually. This can be manually over-ridden, leaving the cordless drill in the high speed range if so desired. The single sleeve chuck holds bits securely and tightly. The die-cast metal gear box insures longer life and an LED light shines on the work area.
The clutch has 24 positions and battery recharge time is 20 minutes or 45 minutes, depending on which battery size you are using. The kit includes the cordless drill, (2) batteries (smaller size), a charger, contractor bag and operators manual.
RYOBI ZRP850 RECONDITIONED CORDLESS DRILL
This cordless drill also has a two speed gearbox and a 24-position clutch. The included one-hour charger has a diagnostic read-out function. This drill also features a magnertic tray bit holder, a bubble level and a GripZone overmold for comfort.The package contains the cordless drill, the one-hour charger, 2 batteries, the one-hour charger, a tool bag and an operators manual.
The lithium ion batteries that come with this cordless drill hold their charge for up to 18 months in storage. The unit is both Lithium-Ion and Ni-Cad Compatible. The Skil 2895LI-02 variable speed cordless drill features an all-metal drive train the delivers 400 Ft-Lbs of torque. It has removable bit storage, a level and a bit index. A soft grip is provided for comfort. The included cordless drill battery charger is ENERGY STAR compliant. A charge meter allows for continual use. Included in the kit is the cordless drill with keyless chuck, (2) lithium ion batteries, the cordless drill battery charger, (2) double-ended bits, a side handle and a carrying case.
ALL ABOUT CORDLESS DRILLS
The original cordless drill had neither a motor nor a battery. There was a hand drill in my father’s workshop long before he invested in an electric drill with a cord. The first battery-powered drill was the tool that started off the cordless revolution which eventually caused all sorts of tools to become available in cordless models. Some types of tools are more suitable to cordless use than others. Usually those tools that move around a lot in use and do not require large amounts of electricity are the best candidates for battery power. So, the electric drill, by its very nature, was the first tool to get a battery.
When you are using a drill at many different locations, its a real pain to have to drag a cord around with you. At first, cordless drills werent very powerful and the batteries didnt last that long. For a while, that was an excuse for woodworkers to resist the upgrade to cordless. Todays cordless drills, especially in the 18 Volt class are both powerful in terms of torque and their lithium ion batteries are long-lasting. The new chargers are fast and so, with two batteries to switch off, its hard to run out of juice.
So where do different models of cordless drills stand apart from one another? Actually, in several areas, the most important being tool weight and twisting power or torque. It used to be a rule that if you wanted more power and/or longer battery life, you had to accept heavier tool weight in your drill. While this is still true, in a general sense, important inroads are being made by major cordless drill manufacturers to turn this equation around.
Tool weight is important in a cordless drill or impact driver because these are tools that you hold out at arms length all day and while 5 to 10 pounds may not sound like much, each weight increase from drill to drill counts for a lot at the end of a long day on the job, even if your name is Hercules.
Power is important because cordless drills are often used to drive screws even though there is a better tool for that job: the impact driver. Most 18 Volt cordless drills come with half-inch chucks and if you have ever drilled a deep ½ hole in hardwood, you know the need for power. You might even find yourself driving a large Forstner bit which is a lot more than 1/2″. You dont want to buy a drill that will bog down on the job.
A cordless drill is the kind of tool that a woodworker uses the most and so it is important to put on your thinking cap to make sure that you are buying the right one for your needs.
Battery size, expressed in amp hours is another important consideration. All Lithium Ion, 18 Volt batteries are not alike in terms of size, weight or how long they will last between charges. That goes for battery chargers, as well. A half-hour battery charger, as opposed to a one-hour charger can make a real difference if you are constantly changing batteries on your cordless drill.
When you comparison shop cordless drill brands, you will note that drill power ratings and drill weights are all over the place. So are the prices. You can save by buying a factory-reconditioned cordless drill but dont buy an underpowered drill with a small battery just to save money. Dont buy an overweight cordless drill just because it has a bit more torque than its lighter competitor. Get the cordless drill you really need. You will thank yourself later.
We only looked at 18 Volt cordless drills in this review. We wanted to compare apples with apples and not apples with with oranges. If tool weight and price are your most important considerations, many of these same manufacturers make 12 and 14.4 volt cordless drill models. These smaller drills usually have 3/8 chucks. That review will have to wait for another day.
QUICK NOTE: To buy any product reviewed below, click on the Buy Now button to go directly to the appropriate page on another secure site to get more information on that product and/or make a purchase. The “Bob’s Pick” logo below indicates which of the products below has earned Bob Gillespies highest purchase recommendation. Below the reviews is a SIDE-BY-SIDE COMPARISON CHART and, finally, an article by Bob Gillespie on important features to consider when shopping and why.
QUINCY MODEL 2V41C60VC 5HP, 60 GALLON AIR COMPRESSOR
This is the smallest air compressor I would consider to run a single air sander. Its single-phase motor runs on 230V AC. Quincy compressors run slower than most competing brands which means they run cooler and cost less to operate. They apparently last longer considering that Quincy rates its compressor pumps at an amazing 50,000 hours. Air output from this air compressor is 15.2 CFM. Maximum tank pressure is 175 PSI. The pump is two-stage and the motor is the capacitor start type with thermal overload protection. Machine weight is 417 Lbs. This air compressor is priced at around $1400.
CAMPBELL HAUSFELD CE 7501 5 HP, 80 GALLON AIR COMPRESSOR
This air compressor should run a single air sander continuously. Its single-phase motor is rated at 5 HP and runs on 230V AC power. Maximum tank pressure is 140 PSI which is lower then the 175 Lb. norm.. Air delivery is rated at 16.1 CFM. The cast iron pump is oil lubed. This air compressor sells for about $2000.
INGERSOLL RAND SS5L5 5HP, 60 GALLON AIR COMPRESSOR
Ingersoll Rand air compressors are rated top-quality in the business and usually sell at a slightly higher price. This single stage Ingersoll Rand air compressor has a single phase, 230V motor and a 60 Gallon tank. This compressor is rated at 135 PSIG and produces a 15.5 CFM air output. Street price is about $920.
CAMPBELL HAUSFELD CE 7000 7.5 HP, 80 GAL. AIR COMPRESSOR
Again, this 7.5 HP, 3 Phase-powered air compressor should run 2 air sanders at the same time. It has an 80 gallon ASME tank. The air compressor motor has a magnetic starter and thermal overload protection. Air delivery is 23.7 CFM at 175 PSI, the maximum tank pressure. Campbell Hausfeld states that their air compressor pump life should exceed 10,000 hours. The CE7000 air compressor weighs 540 Lbs. and costs around $2560.
INGERSOLL RAND 2475N7.5-P 7.5HP, 80 GALLON AIR COMPRESSOR
Look for top quality at a slightly higher price in this Ingersoll Rand “Type 30” air compressor. The motor that comes with this model is 3 Phase. However, an, otherwise identical, single phase air compressor is also available from the same manufacturer. Important extras included are an automatic tank drain valve, an after-cooler and a low oil level interrupt switch. Max tank pressure is 175 PSI. The V-pump is cast iron. A finned copper intercooler is built in. Price for this air compressor is around $2500.
INGERSOLL RAND 2545K10-P 10 HP, 120 GALLON AIR COMPRESSOR
This 3-phase, 10 HP air compressor delivers 35 CFM of air at maximum tank pressure of 175 PSI. Included are a finned copper intercooler, automatic drain, a low oil level interrupt switch and an after cooler. Price tag on this top-quality Ingersoll Rand compressor is around $3800.
SIDE-BY-SIDE COMPARISON CHART: AIR COMPRESSORS
Abbreviations:
CH = Campbell Hausfeld
IR = Ingersoll Rand
Q = Quincy
Q – 5HP
CH – 5 HP
IR – 5 HP
CH – 7.5 HP
IR – 7.5 HP
Q – 10 HP
IR – 10 HP
Street Price
$1,400
$2,000
$920
$2,550
$2,500
$3,300
$3,800
Tank Capacity
60 GAL
80 GAL
60 GAL
80 GAL
80 GAL
120 GAL
120 GAL
Motor Phase
1
1
1
1
3 (or 1)
3
3
Motor Voltage
230
230
230
230
230
200 or 208
200-230
Max. Tank Pressure
175 PSI
140 PSI
135 PSI
175 PSI
175 PSI
175 PSI
175 PSI
SCFM
15.2
16.1
15.5
23.7
16.8
35
35.2
Intercooler
Yes
Yes
Yes
After Cooler
Yes
Yes
Yes
Low Oil Cut-off
Yes
Yes
Yes
Auto Tank Drain
Yes
Yes
Yes
Pump Construction
Cast Iron
Cast Iron
Cast Iron
Cast Iron
Stages
2
2
1
2
2
2
2
Rated Life Hours
50,000
10,000
50,000
Lubrication
Oil
Oil
Oil
Oil
Oil
Oil
Oil
Capacitor Start
Yes
Magnetic Starter
Yes
Yes
Thermal Overload
Yes
Yes
Weight (Lbs,)
540
ALL ABOUT SHOP AIR COMPRESSORS & AIR SANDERS
My experience in manufacturing fine hardwood furniture has taught me that about half the time involved in producing each chair, table or cabinet is taken up with sanding. When you are trying to make a living in the woodworking business with hourly employees you must cut wasted time to an absolute minimum. This does not mean becoming a slave driver but, rather, removing any and all obstacles that may be slowing down construction, sanding and finishing. I started out my woodworking career with a ¼-sheet electric sander, quickly graduated to a random orbit electric disc sander and finally realized that I could substantially shorten sanding time with an air palm sander and an air compressor to power it. I settled on a Dynabrade 5″ random orbit disc air sander and Sears 3HP air compressor. It took me less than an hour to realize my mistake: the little compressor I bought could not begin to keep up air demands of the air sander. The Sears air compressor would run out of air pressure almost immediately and the air sander would slow down to the point of being useless. I would then have to wait for several minutes for the compressor to build up enough pressure again to get another minute of sanding.
To make matters worse, I had three employees hired as sanders and so I would need to keep three air sanders running at top speed all day long. I did some math and discovered that I would need a ten horsepower air compressor with a large tank to do this. I was lucky to find a used 10 HP compressor for not too much money but it required three phase power and lots of it. More money went out for an electrician to wire up the air compressor to the buildings 208 volt 3-phase power. That air compressor was so loud it could be heard all over the building and down the block but it powered those three sanders from dawn to dusk. The good news is that it paid for itself in saved sanding time very quickly.
Air sanders are aggressive and efficient. They are light in weight when compared to their lesser electric cousins. My employees took to them immediately and production took off. I was as happy as they were. Soon there was another machine requiring large amounts of air in the shop: an Onsrud inverted pin router. Plus, it was great to be able to use the air compressor to blow sawdust off benches and machines while cleaning up the shop at the end of the day. An important additional use in my shops was the ability to spray finishes onto the furniture we were manufacturing. The finishes we used (two-part catalyzed varnish and automotive clear coat) dried almost immediately, allowing the furniture to remain dust free in a workshop environment.
Years later, I built a smaller woodworking shop in my home which only required one air sander running at a time. For that shop, I purchased an air compressor half the size of the original 10HP monster and isolated in a soundproof room in one corner of the shop. I ran ¾ galvanized pipe under the shop floor to three water traps and air regulators at three different convenient locations. The air compressor I purchased for that shop was a 5 HP Ingersoll Rand model with an 80 gallon tank. At the 80 PSI required by my single Dynabrade air sander, the 5 HP air compressor would produce enough air all day long. That compressor was very well built: All I had to do was keep an eye on the oil level in the sight glass. At night, I would turn off the master air valve on the side of the air compressor, leaving the electricity on, to silence the machine for the night.
I must assume that, having read this far, you have some interest in using an air compressor to power air tools in your shop. In these compressor reviews, I will be taking a look at models from 5 to 10 horsepower with tanks from 60 to 120 gallons. These are the type of 2-stage reciprocating air compressors most likely to fill the needs of a small to medium shop. As a rule of thumb, a 5 HP air compressor will power one air sander, a 7.5 HP machine will power two and a 10 HP air compressor will be needed for three sanders.
The size of the air compressor tank is an important consideration: the smaller the tank, the more often the compressor will need to cycle on and off: This is hard on the motor and compressor pump over time. I would not even consider an air compressor used to power an air sander with less than a 60 gallon tank and I would feel much more comfortable with an 80 gallon tank.
The type of electrical power required by each, individual air compressor model is another consideration. If you have three phase power available at your location, fine. Three phase motors tend to use electricity a bit more efficiently than single phase motors. Large air compressors will all require 3 phase power but the 5 HP models come either way. If you do not have 3 phase power available, you can manufacture it with a rotary or electronic phase converter as I did in my smaller shop. Whether you use single or three phase power, you will need 230V AC power for single phase motors and 208 or 220V AC for the three phase variety. Be sure to check the voltage and amperage requirements of any air compressor before you buy it. Electricians can be expensive. Three phase power is normally only available in industrial and commercial areas however, as I said, it can be manufactured from single phase, 230 volt power with a phase converter in residential areas.
Two-stage compression is a must for air compressors of the sizes we are reviewing here. Two-stage air compressor pumps have two cylinders, one larger than the other. Air is first introduced into the large cylinder where it is partially compressed and then sent to the smaller cylinder for final compression into the tank. As air is compressed, heat is produced and so a good air compressor will always have a finned intercooler built in.
Compression not only produces heat but squeezes water out of the air which ends up in the compressor tank. The way this works is that when air is compressed, it heats up in the process. Hot air cannot hold as much water vapor as can cold air. The excess water appears in liquid form on the inside wall of the air compressor tank, runs down the sides and collects at the bottom of the tank. Tanks can rust internally over time and if this is not kept in check, the air compressor tank can eventually explode causing tremendous damage and even death. That is why it is critically important to drain the tank of water every day. Most machines come equipped with a drain valve at the lowest point of the tank. If you dont want to spray water all over the floor under the air compressor, you may want to consider piping it from the valve to another location such as under the floor or into a drain. Piped water will flow uphill into a sink because it is being pushed out of the air compressor tank by compressed air. Be sure to incorporate a shut-off valve in your drain line.
As in an automotive engine, periodic oil changes are required for reciprocating air compressor pumps. Draining the oil from a compressor pump can be messy if you don’t plan ahead. On my 5 HP machine, the oil drain plug was located in a place that would spill used oil all over the base of the compressor pump and the tank below. To circumvent this, I recommend you install a drain pipe from the oil drain point on the crankcase to a drain valve at the other end of the pipe located out at the exterior of the machine, clear of the tank below. Then, all you need to do is open the valve and let the oil flow into an old oil bottle or other convenient receptacle.
You will need at least one air regulator and a water trap in line before it. These are not expensive. A regulator allows you to set the correct air pressure for the tool you will be using (say, 80 PSI) instead of tank pressure (say 175 PSI). The water trap keeps water out of spray guns and air tools.
Air output of a compressor pump is expressed in standard cubic feet per minute (SCFM) or just cubic feet per minute (CFM). Not all 5 HP compressors put out the same volume of air per minute. This is a function not only of motor horsepower but also the efficiency of the compressor pump the motor is powering. The higher the CFM, the less your compressor will have to cycle on and off to keep up with the demands you are putting on it. A small compressor pump on a huge tank will produce no more air than on a small tank. The only difference will be in the number of times the compressor cycles on an off each hour and the time it takes to recompress the tank on each cycle. In the end, you need to pay attention to SCFM (or CFM) more than you do motor horsepower or tank size. Air is the end product of any compressor and the CFM must be sufficient to the job at hand.
All reciprocating air compressors throw out a bit of oil with the air they compress. When the tank reaches its designed maximum pounds per square inch, a pressure switch will interrupt electrical power to the motor. Simultaneously, a certain amount of slightly oily air will be released into the shop environment. You may see oil collecting on the wall behind the compressor and on the pump and compressor as well over time. This is not cause for alarm but periodic cleaning with a de-greaser may be needed.
A reciprocating (piston type) air compressors make noise and this is something you need to plan on for the sake of yourself, your workers and others who surround your location. If quiet is an important criteria, you may want to consider spending the extra money for a screw-type air compressor. Screw-type compressors have no pistons or cylinders. Air is compressed in turbine fashion by a large metal screw, turning at a very high speed. These compressors just purr compared to the reciprocating type but they are also very expensive. They sound more like a quiet jet engine than a loud truck motor.
QUICK NOTE: To buy any product reviewed below, click on the Buy Now button to go directly to the appropriate page on another secure site to get more information on that product and/or make a purchase. The “Bob’s Pick” logo below indicates which of the products below has earned Bob Gillespies highest purchase recommendation. Below the reviews is a SIDE-BY-SIDE COMPARISON CHART and, finally, an article by Bob Gillespie on important features to consider when shopping and why.
BOSCH 1591 EVSK (BARREL GRIP) JIGSAW
Both models offer a one-touch jigsaw blade change system which includes one-handed jigsaw blade insertion and lever ejection of used jigsaw blades. Motor power is a hefty 6.4 amps which compares favorably to other jigsaw models. The variable speed dial has a range of 500 to 2800 strokes per minute. Stroke length is a standard 1. A precision control system minimizes jigsaw blade wander. The barrel grip model has a soft covering around the barrel for precise control with reduced vibration. Electronic speed control is built-in. The jigsaw foot does not require a wrench for bevel adjustment and the jigsaw bevel is shown in degrees on a scale from 45 degrees left to 45 degrees right. A counter-balancing mechanism reduces jigsaw vibration. The plunger is designed to of T-shank jigsaw blades and a large variety of types is widely available.
The 4 position oscillation switch takes you from smooth to aggressive in stages. A smooth overshoe cover attaches to the jigsaw foot to protect delicate materials. On the barrel grip model, a lock-on power switch replaces the trigger lock in the D-handle model and reduces thumb fatigue. A powerful air blower keeps the cut line clear. These jigsaws will cut plastic up to 1¼ thick and stainless steel up to 1/8 thick. Both the barrel grip and D-handle models weigh 6 Lbs. Street price on the top-handle model is about $160 and the barrel grip is about five dollars more.
DEWALT DW331K (TOP-HANDLE) JIGSAW
This jigsaws powerful 6.5-amp motor powers blade strokes over a range from 500 to 3100 SPM. There are 4 orbital settings for smooth or fast cutting. The jigsaw foot bevels left or right 0 to 45 degrees with detents at 0, 15, 30 and 45 degrees. Variable speed on this machine is trigger controlled and there is a trigger lock at full speed for operator comfort. This jigsaw includes a dust blower and a lever-action jigsaw blade change mechanism. T-shank jigsaw blades are used.
A unique design feature of the Dewalt jigsaw is the flush-cutting blade system which allows you to complete flush cuts without up-cutting. The jigsaw is counterbalanced to reduce vibration and features an all-metal gear case for durability. Included are an extra-large rubber grip and a non-marring shoe cover for the jigsaw foot plate. Weight is 6.4 Lbs.
FESTOOL TRION PS 300 EQ (BARREL GRIP) JIGSAW
Whenever I review a bunch of tools, the Festool tool is always the most expensive. Whatever tool Festool produces is usually sold as being the best-of-the-best. You will need to decide if the undoubted German-engineered quality justifies the extra expense. Both Festool models are priced at $310 exactly, everywhere. Having said that, the Festool Trion Jigsaws may prove to be worth the price charged.
I mentioned above that blade control was probably at the top of my list of important features to consider. Festool is very specific and descriptive of what it has done to address this issue in its jigsaws. Both models have three blade guides. Two are right next to the sides of the blade and they are backed up by a rear thrust bearing right behind the back edge of the blade. This means that the blade has simply nowhere to go except straight ahead. It is forced to remain straight and perpendicular. The result is smooth control around curves, right along the saw line. Specifically, the guides are located next to the pendulum rod, next to the pendulum guide roller and, as I said, on either side of the blade. Both jigsaws offer zero-clearance inserts to practically eliminate splintering.
Jigsaw blade changing is fast and easy: Just move a lever and the old jigsaw blade drops out. Replace the jigsaw blade and let go of the lever. As in all Festool machines, dust collection is excellent: Dust collection channels are located under the jigsaw foot plate and the cutting area is surrounded by a dust shroud. You will need a Festool vacuum and hose to use this feature and, if you dont have these already, you will have to add them to the cost of the machine. Fortunately, you only need one vacuum system that fits all Festool tools and you dont need to use a vacuum system at all, if you dont want to. Just dont expect to be able to hook your Festool jigsaw to a Shop-Vac, Ridgid, Sears or other shop vacuum you may already own. The hose wont fit.
Both Festool jigsaws have four different oscillating adjustment positions from smooth to coarse, electronic speed control, and a variable stroke rate of from 1000 to 2900 SPM. The jigsaw foots bevel adjustment is from 0 to 45 degrees in both directions. Maximum cutting depth into wood is 4 ¾ or 3/8 into soft steel. The base plate is non-marring for delicate materials. The barrel grip model weighs 5.06 Lbs. and the top-handle machine 5.29 Lbs.
HITACHI CJ110MV (TOP-HANDLE) JIGSAW
The amperage on this jigsaw is a comparatively small, but sufficient 5.8 amps and the stoke speed range is 850 to 3000 SPM. Maximum cutting depth in wood is 4 5/16 and in metal, 3/8. Stroke travel is 1.
This jigsaw features tool-less blade change, 4 orbital settings and the jigsaw foot plate bevels 45 degrees left or right of vertical. Hitachi has included a top-mounted LED light, a dust blower and electronic speed control. A lock-on switch is used instead of a trigger lock. A soft, elastomeric material covers the jigsaw for better absorption of vibration. The Hitachi jigsaw weighs only 4.9 Lbs.
MILWAUKEE 6268-21 (TOP-HANDLE) JIGSAW
This top-handle Milwaukee jigsaw features a powerful 6.5 amp motor, a stroke range of 03000 SPM and 4 orbital settings. Keyless jigsaw foot plate adjustment is up to 45 degrees in both directions. Stroke length is 1. There is a variable speed wheel built-in with 7 distinct settings, a trigger lock and a LED light. 4 orbital settings assure smooth to fast cuts. A trigger lock provides comfort for the jigsaw operator. The jigsaw blade change system is of the quik-loc variety.
A precision, low-mounted roller blade guide assures jigsaw blade stability. This jigsaw is counterbalanced for reduced vibration. It has electronic speed control with tachometer feedback. It uses T-shank jigsaw blades, has a dust collection port and a 10-position dust blower. Weight is 6.35 Lbs.
SIDE-BY-SIDE COMPARISON CHART: JIGSAWS
MIL-
BOSCH
DEWALT
FESTOOL
HITACHI
WAUKEE
Street Price
$190
$149
$250
$86
$170
Anti-Splinter Inserts
Yes
Bevel Adjust
Tool-less
Keyless
Bevel Detents
Yes
Bevel Range
45 deg, L&R
45 deg, L&R
45 deg, L&R
45 deg, L&R
Blade Change
One-Touch
Lever Action
Lever Action
Tool-less
Quik-Loc
Blade Control
Precision
3 Guides
Roller Guide
Blades Used
T-shank
T-shank
T-shank
Counterbalanced
Yes
Yes
Yes
Depth of Cut Metal
1/8″
3/8″
3/8″
Depth of Cut Plastic
1 1/4″
Depth of Cut Wood
4 3/4″
4 5/16″
Dust Blower
Yes
Yes
Yes
Dust Port
Yes
Yes
ESC
Yes
Yes
Yes
Yes
Yes
Flush Cutting Ability
Yes
Foot Mar Protect
Overshoe
Overshoe
Non-Marring
Light
Yes
Yes
Machine Weight
6.0 Lbs.
6.4 Lbs.
5.06 Lbs.
4.9 Lbs.
.
6.35 Lbs.
Motor Amps
6.4
6.5
6.0
5.8
6.5
Orbit Settings
4
4
4
4
Soft Grip
Yes
Yes
Speed Lock-on
Switch
Trigger Lock
Switch
Trigger Lock
Speed Range
500-2800
500-3100
1000-2900
850-3000
0-3000
Stroke Travel
1″
1″
1″
Variable Spd. Dial
Yes
Yes
ALL ABOUT JIGSAWS
Ive been using jigsaws longer than Id like to admit. I found the first jigsaw lying around my Dads woodworking shop in the basement of my childhood home. A few years after that, I purchased a cheap jigsaw from Sears. That jigsaw gave me with the quick usefulness that all jigsaws provide but there were persistent and annoying problems without apparent solutions: First, the jigsaw blades had no guides so they would always wander away from the cut line, especially when I was trying to track curved pencil lines. Second, when cutting curves in thick material, the jigsaw blade would bend toward the outside of curve. Third, early jigsaws did not have orbital pendulum action and so they would load up and burn in thick materials. Changing jigsaw blades required a screwdriver and you had to be careful not to lose the set screw.
Todays top-quality jigsaws have eliminated all of those problems and are, by comparison to the earlier jigsaw models, revolutionary. I will confine my remarks to better quality jigsaws because there are still bargain basement jigsaw models out there with some or all of the problems I just outlined. Having said that, here are the important things that you should be looking for in your next jigsaw.
At the top of my list are the subjects of jigsaw blade tracking and blade guides. Take a close look at how each jigsaw manufacturer has approached these challenges because you are probably not going to get a chance to try out your next jigsaw before buying it. Look for specifics: Some jigsaw manufacturers simply say something like superior blade tracking without saying how this is accomplished. Others are convincingly descriptive.
Another issue with all jigsaws is wood splintering. Most, but not all, jigsaw blades are designed to cut on the upwards stroke which means that the splintering often occurs on the good side of the board or plywood. Splintering can be minimized in two ways: fine-cut jigsaw blades and anti-splinter inserts mounted in the jigsaw foot immediately adjacent to each side of the jigsaw blade. Fine-cut blades cut slowly and so if speed is a requirement and you are using a more aggressively-toothed jigsaw blade a splinter insert is an absolute necessity unless you plan to sand and/or rout away the splintered area later.
Frequent blade changes are a fact of life with all jigsaws. In the interest of production efficiency, this process should be as fast and easy as possible. Gone are the days of screwdrivers, Allen wrenches and set screws. You want a jigsaw that lets you pop blades in and out in rapid fashion.
If you are health conscious and want to minimize airborne dust in your work area, you may want to collect dust right at its source by connecting a vacuum hose to the jigsaw. In that case, check for a dust port and make sure that it is compatible with your vacuum hose. Personally, I prefer to wear a good dust mask and thus avoid the inconvenience of dragging a vacuum hose along with the jigsaw when I am trying to control the machine along curves.
I mentioned orbital pendulum action above and I would not even consider buying a jigsaw without it. My first orbital jigsaw was a Bosch barrel grip model. I was allowed to try one out in a woodworking store while I was on a business trip and it went home to Hawaii in my suitcase. Heres why: The salesman had a piece of eight-quarter White Oak and encouraged me to cut some curves in it. There were four orbital settings on that machine with the first being no orbital action and each one after that being progressively more aggressive than the one before. With the orbit in the off position, I began a cut. As I expected, the jigsaw slowly labored through the cut and I knew that if I pushed it any harder, the blade would either burn or break. Then, at the suggestion of the salesman, I put the orbit lever in position 4, the most aggressive position, and made another cut. The jigsaw blade flew through the thick Oak as if it were butter. There is a bit more splintering than before but not really that much. Sold, American!
A side benefit of an oscillating jigsaw is extended blade life. When a jigsaw blade is stuck inside a cut, it has nowhere to dissipate the heat. The pendulum action oscillates the blade in and out of the cut, letting cool air in while it is out of the cut. At the same time, the accumulated sawdust is allowed to drop out of the cut so the blade is always cutting new wood, not old sawdust. Thats why, with an ascillating stroke, it can cut faster and stay cooler.
Most good machines, but not all, have Electronic Speed Control (ESC) which is an important nicety. ESC is like the cruise control on your car: It maintains a constant speed with changing load conditions. The harder you push the jigsaw, the more electrical power is delivered automatically to the motor so that the saw blade will not slow down. The analogy is your car on cruise control going up a hill.
Many jigsaws today are available in two different body styles: barrel grip and top-handle (sometimes called D-handle). I have owned jigsaws in both styles and I have a personal preference for the barrel grip style because it is easier to control when making fine cuts. Just like when using a router or any hand power tool, a low center of gravity and a solid grip equate to better control. With a top-handle jigsaw, your hand is at the top of a taller machine and the tendency to tip over is greater. With a barrel grip jigsaw the center of gravity is as low as it can be. There is a knob on top, right over the jigsaw blade, for your other hand for better control. The big, round jigsaw barrel is easier to hang onto than the thinner D-handle.
Jigsaw manufacturers usually measure motor power in terms of amperage, rather than horsepower. This is fine because amperage is a more reliable indicator of actual power than horsepower. The more amperage, the more power and power is important when cutting thick or dense materials.
The speed of the jigsaw blade is expressed in strokes per minute or SPM. The more, the better.
Cutting depth is something you will want to consider when dealing with very thick or dense materials. In soft wood, cutting depth refers to the maximum distance between the bottom tooth on the jigsaw blade and the foot plate of the jigsaw when the blade is fully extended. In metal, plastic or other materials, cutting depth is based on the ability of the jigsaw and jigsaw blade to cut through dense or resistant materials.
Jigsaws are often used to cut expensive and delicate materials such as veneered plywood panels. A standard, steel jigsaw foot plate may leave scratches as it travels along behind the blade. Some jigsaw manufacturers offer coated foot plates, some provide an overshoe for the jigsaw foot plate and some completely fail to address this issue. If you cut delicate materials that can be easily marred, pay careful attention to this feature (or lack of it) in any jigsaw you might buy.
Jigsaw weight is the next consideration. My knee-jerk reaction is to look for the lightest jigsaw so that I wont tire so easily during a long day of cutting. On second thought, light weight in a jigsaw is nowhere near the advantage as it would be in, say, an impact driver or electric drill because the jigsaws weight is almost always resting on the material being cut. Further, a light weight jigsaw could mean that the jigsaw manufacturer skimped on construction materials, possibly substituting plastic parts for metal as a cost savings.
Stroke length is the distance the jigsaw blade’s teeth travel up and down while cutting. This is almost universally one-inch and so it is not a useful number when comparing models from different makers. Generally speaking, the longer the stroke, the faster the cut and the shorter the stroke, the smoother the cut.
Jigsaws can make bevel cuts, usually up to 45 degrees from vertical, both left and right. The more bevel, the thinner the material that can be cut. Adjusting the bevel on a jigsaw can be hard or easy. Some jigsaws require you to use a screwdriver, hex wrench or Allen wrench to loosen or tighten a set screw that holds the jigsaw foot in a particular position. Other jigsaws are designed with the adjusting mechanism built-in and, thus, requiring no tools. Opt for the latter when possible, everything else considered.
All jigsaws vibrate and make noise. Obviously the less vibration and noise the better. Vibration is transmitted to the point of cutting and affects your ability to control the cut. More importantly, vibration is tiring when it goes into the jigsaw operators hand and arm. Various manufacturers have approached this problem in different ways but the most common anti-vibration technique is to counterbalance the motor. The other way is to put vibration-absorbing material on the outside surfaces of the jigsaw that come into direct contact with the hand(s) of the jigsaw operator. Padding will not, of course, minimize the vibration transmitted to the jigsaw blade at the point of cutting. Noise reduction varies by machine design and the only way to make this comparison requires running the motor of each jigsaw you are considering for purchase.
Some jigsaws come equipped with a variable speed wheel to set the maximum speed of the jigsaw for better cutting results in different materials. This is different than the speed control of the variable speed trigger. Full speed on the jigsaw trigger will always be limited by the setting of the variable speed wheel. Most jigsaw triggers have a lock-on feature because holding the jigsaw trigger on all day long can actually make your hand go numb. Barrel grip jigsaws do no have a trigger but use a lock-on type thumb switch instead. If you have the variable speed set at half-speed and you lock the trigger or thumb switch, you will get half-speed at full trigger deflection until you change the setting on the wheel.
Most jigsaws come equipped with some sort of air blower to keep chips away from the cut line. The air blower on the earlier jigsaws was located half-way between the operators chin and nose. Some manufacturers mount the blower nozzle near the point of cutting, others on the top of the machine. Some have adjustable nozzles. The important thing is effective chip and dust removal so you can see where your jigsaw blade is supposed to cut.
Another aid to clear vision of the cut line is a built-in light. LED lights are best because they are bright white and last virtually forever. Just in case they dont, see if they are replaceable and available.
There are several jigsaw blade types available and you will have to use the one that comes with the jigsaw you buy. Fine cut jigsaw blades have many more teeth, leave fewer and smaller splinters but cut slower and are generally shorter in length. They also may be thinner (front to back) to allow for tighter turns around sharp curves. Fine cut jigsaw blades will break easier than a coarse jigsaw blade. Metal cutting jigsaw blades are also available. Use these only for metal because they will not cut wood very easily and they will load up and burn. On the other hand, a wood-cutting jigsaw blade will not be able to cut metal effectively. Depending on the manufacturer, there are many other specialized types of blades available. Make sure you always have plenty of extra blades available to avoid unexpected trips to the store right in the middle of a job.
The following is devoted to a close examination of top-quality jigsaws from Bosch, Dewalt, Festool, Hitachi, Makita Tools, Milwaukee and Porter-Cable. Some of these jigsaw manufacturers make more than one model. Some manufacturers offer models are identical in all features except the choice of barrel grip vs. top-handle. In these cases, I will discuss the common features of both jigsaw models and mention the existence of both designs. I may include photos of both jigsaw models, however. I will do the reviews in alphabetical order, by jigsaw manufacturer.
If you feel overwhelmed by too much information, dont worry. At the end of the reviews above is an easy-to-scan SIDE-BY-SIDE COMPARISON CHART including all jigsaw models reviewed and all features discussed.
QUICK NOTE: To buy any product reviewed below, click on the Buy Now button to go directly to the appropriate page on another secure site to get more information on that product and/or make a purchase. The “Bob’s Pick” logo below indicates which of the products below has earned Bob Gillespies highest purchase recommendation. Below the reviews is a SIDE-BY-SIDE COMPARISON CHART and, finally, an article by Bob Gillespie on important features to consider when shopping and why.
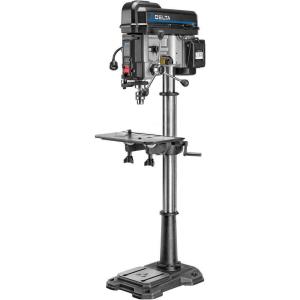
DELTA 6 VARIABLE SPEED BENCH JOINTER
I do not recommend this machine except for making shallow cuts on short boards. Hobbyist woodworking tools like this one are fine for very light work but almost useless in a normal woodworking shop. This jointer should be firmly fastened to your bench top to prevent it from tipping over because of its light, 35-pound weight. The reasons for this are three-fold: (1) The entire table top of this jointer, including both the infeed and outfeed tables is only 30 long. This should not be a problem if your board is only 30 long. However, you try to joint an 8-foot piece of lumber on this little jointer, it might tend to tip up as it enters the in feed table and tip down as it exists the out feed table, raising it above the cutter knives, thus insuring a bad cut. (2) The cutter head on this jointer has only two knives. The more knives, the smoother the cut. I like to see a minimum of 3 knives in a cutter head. (3) The motor is only 10 amps in size, meaning that only shallow cuts are possible. On the plus side, this jointer has variable speed which is a nice feature on any jointer because better cuts can be made at different speeds, depending on the type of wood being jointed. Street price is about $290.
JET JJ-6CS CLOSED STAND JOINTER
This machine is probably the smallest I would consider using in a home woodworking shop for edge-jointing small to medium length lumber for glue-up. It has a 48 overall bed length which should be sufficient for jointing 4 to 6-foot lumber and possibly 8-foot lumber with great care not to let the board tip. Its 6 cutter head means more frequent blade changes but if this machine is only used occasionally, this should not be an important limitation. The machine has a 1-horsepower, industrial-type motor which is adequate for light to medium depth cuts. The 3-knife cutter head turns at 4800 RPM, making 14,400 cuts per minute possible. The fence tilts two ways with positive stops at 90 degrees for jointing and 45 degrees for chamfering. Rabbet cuts as deep as ½ can be made thanks to a rabbeting ledge built into both tables of this jointer. The closed base and 4 dust collection port helps keep your shop from being littered with chips. I like the two, large adjustment knobs located right out front on the left side of the machine. Both the infeed and outfeed tables are adjustable which means that you can make fine knife height adjustments with reference to the outfeed table on without having to adjust the jointer knives themselves. The table ways are dovetailed, assuring accuracy over the life of the jointer. The centrally located fence controls are within easy reach. Street price is about $550. This jointer is also available in a model JJ-6CSDX for those whod like to save time and effort changing knives, time that could have been better used for production. Jets exclusive auto-quick-set mechanism allows you to re-set knives in far less time than required by similar machines. Except for this feature, this jointer model is identical to the Jet JJ-6CS and has a street price of about $750.
JET JJ-8CS 8 CLOSED STAND JOINTER
With this jointer, we move into the world of 8 machines with larger motors and longer beds. The price has increased, although reasonably, considering the improvements over the 6 machines reviewed above. In general, this jointer is similar in function to its smaller brothers, it is simply bigger, better and more powerful. Hand wheels with locking knobs are located underneath the tables at the front and rear of the machine.
One of the most noticeable improvements is an increase from a 1 HP 115v to a 2 HP 220v motor. The extra 2 of knife width means a longer time between blade changes. The overall table surface is 66 ½ long and the 4-inch tall fence is 38 1/2 long. Jointing of 8-foot lumber is without problems. The jointer fence tilts both right and left to 45 degrees in both directions and has positive stops at 45 and 90 degrees. The Jet JJ8-CS 8″ jointer produces over 16,500 cuts per minute with 3 knives. Street price is about $1300.
POWERMATIC 8 PARALLELOGRAM JOINTER
The Powermatic brand has always been synonymous with top-quality woodworking machines, priced accordingly. This is a 2 HP 220v, 8 jointer like the Jet model immediately above. The difference is in the extra measure of quality. Right away, I noticed that the bed is a whopping 82 long which means straight joints on 10 to 12 foot lumber without loss of control. Powermatic offers a unique Parallelogram design that assures maximum close proximity between the tables and the cutter head for an improved finish at any depth-of-cut adjustment. This feature also assures that the infeed and outfeed tables on this jointer will remain in perfect alignment with each other after years of rough use. This Powermatic jointer comes standard with a 2 HP, 220v, single phase motor but is also available with a 3 HP, 3-phase, 220v motor at extra cost. Fence tilt adjustments are by hand wheel and extend left or right 0-45 degrees. The 3-blade cutter head executes 21,000 cuts per minute. Street price is about $2000.
POWERMATIC PJ1696 16 PARALLELOGRAM JOINTER
Just to see what a big industrial jointer looks like, lets take a peek at this 16-inch jointer by Powermatic. This is probably way more than most woodworking shops would ever need or could ever justify but for a large production shop, this giant jointer may just be the ticket. The huge, 16 cutter head width insures long intervals between knife changes.
This machine has what is known as a helical head which means that there are 58 two-sided small blades that are inserted into slots in the head in a spiral-like pattern. There are two additional knives used for rabbeting. This type of head produces extremely smooth cuts up to a maximum depth of ¾.The 5200 RPM speed of cutter head rotation gives you 20800 cuts per minute. The tables include rabbeting ledges for cutting rabbets as deep as ¾.
A 96 bed assures smooth cuts along long lumber and easy lumber handling. The standard motor is 7.5 HP, 3-phase wired for either 230 or 460 volts. The machine weighs in at 1280 Lbs. with a shipping weight of 1400 Lbs. 800 CFM dust collection (minimum) is required through a 6 dust port in the enclosed cabinet. Street price is around $7809.
SIDE-BY-SIDE COMPARISON CHART: JOINTERS
Delta 6″
Jet 6″
Jet 8″
Powermatic 8″
Powermatic 16″
Bench Top
JJ-6CS
JJ-8CS
Parallelogram
Parallelogram
Jointer
Jointer
Jointer
Jointer
Jointer
Cutter Width
6″
6″
8″
8″
16″
Table Length
30″
48″
66.5″
82″
96″
Motor
10 Amp
1 HP
2 HP
2 HP
7.5 HP
No. Knives
Two
Three
Three
Three
Helical
Weight
35 Lbs.
258 Lbs.
398 Lbs.
616 Lbs.
1280 Lbs.
Street Price
$290
$750
$1300
$2000
$7809
ALL ABOUT JOINTERS
The principal function of a jointer is to put a straight, smooth, level edges on boards in preparation for edge-to-edge glue-up.
Rabbeting can be accomplished on some jointer models but I prefer to use the table saw for this task. Chamfering, or making angled cuts, can be performed on these woodworking tools by tilting the fence. Accurate jointing or chamfering requires that the cutter head knives in these machines be adjusted precisely with reference to the outfeed table. The edge of each cutter head knife must be exactly at the level of the outfeed table: not above or below it.
In most cases, sharpening the cutter knives requires that they be removed completely from the jointer cutter head and then replaced and adjusted after sharpening. This is why I recommend the use of solid carbide as opposed to high speed steel knives in a jointer: Carbide lasts a lot longer and that means less time and effort has to go into removing, replacing and adjusting knives. Buy two sets. That way, you can continue to use your jointer while the dull set is out for sharpening and you will always have a sharp set waiting. Come to think of it, you should consider doing this with all of your woodworking tools: extra blades on hand for the table saw, band saw, circular saw, etc. will keep your shop running smoothly and continuously.
Always unplug your jointer from electrical current before attempting any adjustments to the knives. In my jointer, an 8 Rockwell/Delta classic, the knives are removed and replaced by using a flat wrench that came with the machine. This wrench is used to loosen and tighten the hex head machine screws that press against the knives and hold them in place in the cutter head of the jointer. It is very easy to round over the hex heads, so I am very careful not to do so.
I purchased a gadget that helps me align the knives with reference to the outfeed table of the jjointer. It magnetically attaches itself to the surface of the outfeed table and magnetically attracts the knives upwards and holds them in position while I tighten the hex bolts. Each knife (there are 3 in my machine) must be in the extreme vertical position before it can be individually correctly adjusted and tightened. When all 3 knives have been set properly, they should just touch, but not lift, a flat piece of wood laid on the outfeed table, extending over the cutter head of the jointer. They must do this across the entire width of each knife.
Today we tool a look at a wide range of jointers. Jointer size is most commonly determined by the full width of the cutter head. A 6 jointer makes a maximum 6-wide cut. An 8 jointer makes a maximum 8 cut and so on. It would be rare to use the entire width of even a 6 knife at once: The real advantage of wide blades is that you can move the fence across the jointer bed to use a sharper place on the knives when part of the knives becomes dull. The wider your knives, the more use you will get out of them before it is time to re-sharpen. I usually start with a sharp knife and adjust the fence all the way to the right end of the cutter head. I can then move the fence to the left, in increments a bit wider than the maximum board thicknesses, until the knife edges are dull across their entire width.
Sometimes, with curly or wavy grain structure, you will experience tear-out from the lumber edge even with sharp knives. Sometimes you can turn the board around and run it through again with very shallow cuts until the edge is fully jointed and the tear-out is gone. At other times, you may have to settle for a sawn joint made on the table saw. Usually you can make fairly good glue joints this way, if you have to, but a edge made on a jointer is always my first choice.
The depth of cut is determined by the height of the infeed table with reference to the outfeed table. The lower the infeed table, the more wood is removed with each pass over the jointer. It is not a good idea to take off too much wood in a single pass. The chances of tear-out increase with the depth of cut and you may end up removing more precious wood than you really need to, to get your perfect joint.
QUICK NOTE: To buy any product reviewed below, click on the Buy Now button to go directly to the appropriate page on another secure site to get more information on that product and/or make a purchase. The “Bob’s Pick” logo below indicates which of the products below has earned Bob Gillespies highest purchase recommendation. Below the reviews is a SIDE-BY-SIDE COMPARISON CHART and, finally, an article by Bob Gillespie on important features to consider when shopping and why.
JET JML-1014 VSI – 10”x14” VARIABLE SPEED MINI WOOD LATHE
This wood lathe is short on bed length but if 14 is the longest spindle you will ever turn, this machine should be fine for you. An optional bed extension is available that extends this length to 39 3/8 but be forewarned that the motor is only ½ HP, adequate to the lathes 10 swing (5 over bed). This is a small lathe, meant to be a small wood lathe and, operated within its capabilities, it is excellent machine in every respect. It is extremely quiet and smooth-running. It features 500-3900 RPM variable speed which is pretty much a must, especially if you plan on turning small bowls. In short, you get top quality in a small wood lathe. Lowest price is about $480.
JET JWL-1220 12 x 20 WOOD LATHE
This wood lathe has a bit larger swing 12 (6over bed) than the previous model and a more generous bed length of 20. This model is priced about the same as the JML 1014 but it does not have the variable speed feature. The motor HP (required for the larger swing) is ¾ HP vs. ½ HP for the JML 1014. It has an indexing mechanism for fluting and veining operations. Lowest price is about $500.
DELTA 46-460 VARIABLE SPEED MIDI WOOD LATHE
In the same approximate speed range as the two Jet lathes above is the Delta 46-460. It has a 16 ½ center to center (max spindle length) but features a generous 12 ½ swing (6 ¼: above bed). It has variable speed capability with a range of 250 to 4000 RPM. It has a 1 HP motor and a 6-groove belt. It has a solid, heavy base which will help with vibration dampening. The head stock spindle can be indexed into 24 different positions for fluting and veining. Lowest price is about $650.
JET JWL-1642-EVS-2 16x 42 FULL SIZE WOOD LATHE
This wood lathe has a smaller 14 x 42 model for less money but other than that model’s 14 (7 over bed) vs. thid unit’s 16 swing (8 over bed) and that model’s smaller motor, there is no difference in features or quality. This wood lathe represents a big price jump over the smaller lathes above but it also represents a huge jump in terms of lathe capacity. The 16 model comes as part of a very nice package which includes a sturdy stand, long tool rests, faceplates, live centers, spur centers, spindle locks, indexing locks and knockout bars. The legs have special webbings cast into them to accept 2x4s for supporting a solid shelf for tools and/or sand bags to dampen the vibration from this larger wood lathe when turning larger materials.
A Reeves variable speed drive lets you index between eight speeds, ranging from 0 RPM to 3,200 RPM with digital readout. The headstock slides to the opposite end of the bed to allow for outboard turning of large bowls. You can also index the spindle every 10 degrees for fluting and veining. Face plates and chucks can be more readily removed by using the built-in spindle lock. The 16 model is available with either 1 ½ HP Single Phase Motor or a 2 HP 3-Phase motor at extra cost. The 14 version has a 1 HP, single phase motor. Lowest price on the 16″ package is about $2400.
POWERMATIC 3520B LATHE 2HP 220V 20 x 34 ½ WOOD LATHE
This Powermatic wood lathe features industrial capabilities and big price tag. If you need a wood lathe like this, here it is. If you dont, save your money. If this wood lathe is not large enough, we have one ahead that probably will be. The sliding headstock features digital speed readout. This wood lathe features a spindle lock and built-in spindle indexing, a 14 tool rest with better geometry to allow for better chisel movement, a self-ejecting laser-etched quill, a two-position mount for the optional bed extension, an optional dust collection assembly that travels with the tool rest, chrome-trimmed hand wheels, a safety shield, a ball bearing live center and a brass-tipped knock-out rod. Choose between a single phase or 3-phase 220 V motor. This wood lathe weighs 630 Lbs. with a ship weight of 680 Lbs. Lowest price is about $3900.
POWERMATIC 4224 WOOD LATHE 3 HP 220V 24 x 42
This is the industrial wood lathe I referred to earlier. It has a 24 swing (12 over bed, 9 ¼ over the tool rest base) and 42 between centers. Imagine what you could do with a wood lathe this size! The headstock is not moveable, probably because it needs to be extremely strong and rigid to be able to swing a spindle up to the capacity of the machine. It has a 3-step poly V-Belt drive and a digital readout. Electronically controlled speeds in these 3 pulley positions are 0-900, 0-2000, and 0-3500 RPM respectively. This wood lathe can be operated in both forward and reverse. It can also swing very large bowl blanks up to 48 in diameter. This wood lathe weighs 891 Lbs. Lowest price is about $5118.
SIDE-BY-SIDE COMPARISON CHART: WOOD LATHES
Jet JML-1014
Jet JWL-1220
Delta 46-460
Jet JWL 1642
Pwrmat. 3520B
Pwrmat. 4224
Low Price
$480
$500
$650
$2,400
$3,900
$5118
Bed Length
14″
20″
16.5″
42″
34.5″
42″
Swing
10″
12″
12.5″
16″
20″
24″
Motor HP
1/2 HP
3/4 HP
1 HP
1 1/2 or 2 HP
2 HP
3 HP
Variable Spd.
500-3900 RPM
NONE
250-4000 RPM
0-3200 RPM
0-3200 RPM
0-3500 RPM
ABOUT WOOD LATHES
The more experience you have as a wood turner, the easier it will be to choose your next wood lathe. To accommodate everyone from beginner to expert, I will try to keep my comments basic and yet complete. If you are an expert, please bear with me. If you are a beginner, this review may save you a lot of headaches at the school of hard knocks.
Id like to start out by saying that creating beautiful lathe turnings is an art which requires a certain amount of specialized talent. The only way for you to know if you have this talent is to take some lessons from an accomplished woodturner. You can be an excellent woodworker, adept at the table saw, band saw or router or other woodworking tools and yet, not have the particular kind of fine touch that it takes to be a master at the wood lathe. Before you fork out your hard-earned dollars for a dream wood lathe, get some experience first.
There are some basic things to know when shopping for a wood lathe and probably the most important question you might want to ask yourself is, What do I want to produce on my new wood lathe? and, What do I think I might want to produce on my wood lathe in the foreseeable future?. If all you ever want to do is turn pencil and pen blanks, a micro lathe is all you need. If you plan on turning out huge pedestals for round tables, you might want to consider investing in one of the larger, industrial lathes available to you at a price.
Numbers wise, you will want to consider the lathes bed length, the distance between the base of the tool rest and the center (diameter that can be turned), the maximum diameter of bowls that can be turned safely (usually on the outboard side of the wood lathe head), the horsepower and RPM of the wood lathe motor and the variable speed range.
One thing that may not be immediately obvious is that all lathes create vibration. This vibration is transmitted to the point where the cutting tool touches the wood. Vibration makes for poor or rough cuts and vibration must be dampened out as much as possible. A flimsy lathe stand is not going to do this for you. I went so far as to build a heavy wood lathe bench which incorporated a large box which I filled with sand bags. A heavy-duty stand might suffice for you, however.
Usually I review woodworking tools that are roughly comparable in size, features and power. In this review, however, because of the wide variety of wood lathe designs and capabilities, I compared lathes of vastly different measurements and capacities side-by side. If you have gained a bit of experience and have asked yourself the two important questions in paragraph 3, above, then this multi-lathe review should help you find the best wood lathe for you. Ill started off with the smallest and least expensive and worked up to the largest wood lathe with the highest price tag and the most capabilities.
QUICK NOTE: To buy any product reviewed below, click on the Buy Now button to go directly to the appropriate page on another secure site to get more information on that product and/or make a purchase. The “Bob’s Pick” logo below indicates which of the products below has earned Bob Gillespies highest purchase recommendation. Below the reviews is a SIDE-BY-SIDE COMPARISON CHART and, finally, an article by Bob Gillespie on important features to consider when shopping and why.
BOSCH 12 MODEL 5412 SLIDING COMPOUND MITER SAW
The most remarkable thing about this saw is the fact that its controls are all accessible from the front. The multi-function handle makes adjusting the bevel a breeze. The miter settings are adjustable in micro fine increments. The base measures 25 ½ inches and the built-in extensions increase that to 40. The machine features tall (4.5) sliding fences for cutting crown molding. Etched into both the base fence and the extended fences are bevel and miter scales for easy setting of accurate bevel and miter angles. The wedge and slot miter detents insure long life without wear that causes inaccuracies over time in other saws. 31.6 and 33.6-degree bevel detents are provided for quick and accurate cuts in crown molding. This saw has a miter detent override feature so that you can use accurate settings just to the right or left of a detent. An electric brake stops the blade in seconds which is handy for repetitive cuts. A spindle lock is provided for quick blade changes. This 12 model is priced at around $570. A similar 10 saw, Bosch Model 4410L, can be had for about $550.
DEWALT 12 MODEL DW 718 SLIDING COMPOUND MITER SAW
This model features an innovative back fence design that allows deeper and wider cuts than would normally be available on a saw of this size. In fact, this machine can cut base molding up to 6 ½ when standing vertically against the back fence. Using the same back fence feature, dimensional lumber of up to 2 x 16 can be cut at 90 degrees or 2 x 12 at 45 degrees. A miter detent override allows cuts right next to detents. 10 positive miter stops are provided. A cam lock on the miter handle makes miter changes quick and easy. Bevels of 0-48 degrees are possible in both directions. This saw is the noisiest of the lot reviewed. Online, it is priced at about $500. A DeWalt 10 Model DW 717 can be purchased for around $500.
FESTOOL 10 MODEL KS 120EB SLIDING COMPOUND MITER SAW
No doubt this is a fine saw and smoothness and accuracy are its German-engineered calling cards. However, like all Festool products, this one comes with a very large price tag when compared to the competition. Perhaps Festool would argue that there IS no competition. Ill let you be the judge of that. The machine offers a unique rail front design that makes it possible for the saw to be operated right up against a wall and makes it easier to carry. The bevel range is 47 degrees to either side and the base table rotates 50 degrees to the left and 60 degrees to the right. Molding up to 4 ¾ can be trimmed and lumber up to 3 can be cut. There is a micro fine bevel adjustment capability and a unique double laser that marks both sides of the kerf simultaneously. This is the only variable speed unit reviewed. An included angle transfer device takes angle measurements directly from the wall and then transfers them to the machine for exact cuts into baseboard or molding. There is no 12 model available. Be aware than the blades arbor hole is measured in millimeters and so you may be stuck with buying your blades from Festool or another European manufacturer. Priced at $1300 everywhere.
HITACHI 12 MODEL C12LSH SLIDING COMPOUND MITER SAW
This saw comes with a digital display, mounted right up high, which swivels to where it can be easily read showing both miter and bevel angles. This, coupled with micro fine miter and bevel adjustments, assures precise settings for accurate cuts. A compact slide system allows the saw to travel along fixed rails, eliminating the need for rear clearance. A large, pivoting fence makes 4 11/16 crown molding cuts possible. Easy access to motor brushes makes periodic maintenance easy. This machine includes a single beam laser marker for precise cuts. Priced at around $639 online.
A 10 Model C10FSB is also available and is of a different design featuring a soft start motor, electronic speed control and electric brake. The 10 machine is priced around $529.
JET 12 MODEL JHS-12SCMS SLIDING COMPOUND MITER SAW
This unit features an innovative green XACTA laser guide that projects an accurate laser line that is easy to read, even outdoors. The 15 Amp motor has an electric brake for repetitive cuts. An integrated cord wrap means you wont have to drag a loose cord trailing in the dirt. The unit features up-front controls, 5 bevel detents and 10 miter detents. Find one online for about $670. A 10 Model JMS-105CMS is available for around $480.
MAKITA 12 MODEL LS1216L SLIDING COMPOUND MITER SAW
Makita makes a lot of miter saw models but this one has it all, including a laser marker. It has 9 Miter detents but its miter swing is limited to 45 degrees left and right. It has a 15 Amp direct drive motor with electronic speed control to maintain blade RPMs through the toughest cuts. With direct drive, you definitely want the soft start feature and this saw includes that, as well. An electric brake stops the saw blade as soon as the power switch is released. It has a large turning base and an adjustable fence for supporting larger stock and crown molding. It can crosscut 4×12 material at 90 degrees. This model sells online for around $620. A similar 10 Model LS 1016L runs about $480.
MILWAUKEE 12 MODEL 6955-20 SLIDING COMPOUND MITER SAW
The thing that stands out about this saw as opposed to the other woodworking tools reviewed here is the miter angle digital readout located at the operator end of the miter arm. With this, you can achieve repeatable accuracy to one-tenth of a degree. The micro fine adjustment knob makes it simple to dial in these precise measurements and the detent override allows you to go as close to a detent as you need to. The 15 Amp, 3.3 HP motor gives you more than sufficient power to zip through the thickest and hardest of lumber. Constant power management allows the motor to maintain its speed while cutting and soft start keeps the head from jumping on start-up. Two lights, one on each side of the blade, illuminate the cut. Bevel adjustments can be made from zero to 48 degrees on each side with a single lever. A 10 model is not available. Priced around $649.
SIDE-BY-SIDE COMPARISON CHART:
SLIDING COMPOUND MITER SAWS
TWELVE INCH SAWS:
Bosch 12″
DeWalt 12″
Festool
Hitachi 12″
Jet 12″
Makita 12″
Milwaukee 12″
Model Number
5412
DW718
See Below
C12LSH
JMS-12SCMS
LS1214FL
6955-20
Amps
15
15
15
15
15
15
Approx. Online Price
$550
$500
$639
$670
$620
$649
Arbor Size
5/8″ or 1″
1″
Base Width
25.5″
Base Width with Ext.
40″
Belt Drive Motor
X
X
X
Bevel Control on Front
X
Bevel Detents
7
5
9
Bevel Fine Adjustment
X
Bevel Left (max)
45
45
48
Bevel Right (max)
45
45
48
Blade Included
Carbide, 60T
Carbide
Carbide, 70T
X
Brush Access (Motor)
X
Cam Lock Miter Handle
X
X
Cord Wrap (Integrated)
X
Crown Miter Settings
X
Cut @ 45 degrees
8.5″
12″
8 21/32″
8 5/8″
8 5/8″
Cut @ 90 degrees
12″
16″
12″
12″
12.25″
Digital LCD Scale
X
X
Dust Bag Included
X
X
X
Bosch 12″
DeWalt 12″
Festool
Hitachi 12″
Jet 12″
Milwaukee 12″
Bosch 12″
DeWalt 12″
Festool
Hitachi 12″
Jet 12″
Model Number
5412
DW718
See Below
C12LSH
JMS-12SCMS
LS1214FL
6955-20
Direct Drive Motor
X
X
Elec. Speed Control
X
X
Electric Brake
X
X
X
Extension Wings
2
Height
28.25″
HP
3
3.3
Laser
Opt. Extra
Single
Single
Single
Laser Microfine Adj.
X
Length
28.5″
Length Stop Built In
X
Max Fence Height
4.5″
6.5″
Microfine Miter Adj.
X
X
X
Miter Detent Override
X
X
Miter Detents
X
10
10
10
Miter Digital Readout
X
Miter Left (degrees)
52
60
50
46
45
45
Miter Right (degrees)
60
50
60
57
45
60
Multi-pos. Handle
X
Rails
2
2
2
2
2
2
2
Right Bevel (degrees)
RPM
3800
3600
3200
3200
Soft Start
X
X
Bosch 12″
DeWalt 12″
Festool
Hitachi 12″
Jet 12″
Makita 12″
Milwaukee 12″
Model Number
5412
DW718
See Below
C12LSH
JMS-12SCMS
LS1214FL
6955-20
Spindle Lock
X
Sub-fence (right)
X
Tool Case Included
X
Triangular Rule
X
Up-front Controls
X
X
Vert. Cap. (Crown)
4 11/16″
Vertical Capacity
4″
4.5″
4 7/32″
3 7/8″
Weight
67 Lbs.
52.9 Lbs.
Work Clamp
X
X
X
Work Light(s)
1
2
Wrench (s) Included
X
X
X
X
TEN INCH SAWS:
Bosch 10″
DeWalt 10″
Festool 10″
Hitachi 10″
Jet 10″
Makita 10″
Model Number
4410L
DW717
KS 120 EB
C10FSB
JMS-10SCMS
LS1016L
Amps
15
12
15
Angle Transfer Device
X
Approx. Online Price
$550
$500
$1300
$529
$480
$480
Arbor Size
5/8″
Base Width
21″
Base Width with Ext.
37.25″
Bevel Adj. Counter Bal,
X
Bevel Angle Left (max)
45
45
45
Bevel Angle Right (max)
45
45
45
Bevel Detents
7
3
Bevel Fine Adjustment
X
Blade Included
X
X
Brush Access (Motor)
X
Cam Lock Miter
X
Cord & Tool Storage
X
Cut @ 45 degrees
12″
8.46″
Cut @ 90 degrees
14″
12″
12″
Direct Drive Motor
X
X
Dual Bevel
X
X
Elec. Speed Control
X
X
Electric Brake
X
X
Height
19″
18.5″
Laser Microfine Adj.
X
Laser Tracking
Single
Dual
Single
Single
Length
37.25″
28″
Bosch 10″
DeWalt 10″
Festool 10″
Hitachi 10″
Jet 10″
Makita 10″
Model Number
4410L
DW717
KS 120 EB
C10FSB
JMS-10SCMS
LS1016L
Microfine Miter Adj.
X
X
Miter Detent Override
X
Miter Détent Override
X
X
Miter Detents
X
10
9
Miter Detents
11
10
Miter Left (degrees)
60
47
45
Miter Right (degrees)
52
47
57
Multi-pos. Handle
X
Rails
2
2
2
2
4
Right Bevel (degrees)
46
Rotary Base Left (deg.)
50
Rotary Base Right (deg.)
60
RPM
4800
1400-3400
Soft Start
X
Spindle Lock
X
Splinter Guard
X
Triangular Rule
X
Up-front Controls
X
X
Vacuum Dust Collection
Opt. Extra
Variable Speed
X
Vert. Cap. (Crown)
3 5/8″
6.25″
4.75″
6 5/8″
Vertical Capacity
4.75″
Weight
55 Lbs.
51 Lbs.
47 Lbs.
Work Clamp
X
X
X
X
Work Light
Wrench(s)
X
X
About Sliding Compound Miter Saws
The sliding compound miter saw tops the list of woodworking tools that can make accurate and smooth angled cuts used in everything from fine cabinet work to house building. It’s lesser cousins include cut-off saws, so-called “chop saws” and any miter saw without the slide.
In this review, we considered the relative merits of various sliding compound miter saws from six different manufacturers: Bosch, DeWalt, Festool, Hitachi, Jet, and Makita Tools. Do you need a 12″ miter saw or will a 10″ miter saw do? The pros of choosing a 12 miter saw over a 10 miter saw are greater cutting height and depth and usually more power. The advantage of a 10 miter saw is lower weight and lower cost. If a 10 miter saw will make all the cuts you can envision making in your shop or on the jobsite, by all means choose the smaller miter saw. The design and quality will be similar or identical within any particular brand. We will review only one miter saw per manufacturer. However, I will point out significant differences between the 12 and the 10 models, if any.
At the very bottom of the reviews, we included a SIDE-BY-SIDE COMPARISON CHART in which the features of all the saws, both 12 and 10 are compared. Obviously features such as maximum height of cut, maximum depth of cut, horsepower and weight are different and you can see those differences in the chart rather than in the reviews.
The obvious advantage of a sliding compound miter saw over a standard miter saw without a slide is that you can crosscut wider lumber in a single pass. With or without the slide, a miter saw can make chop cuts. A chop cut will always give you a finer, smoother result but on wider lumber, you may need to push-through as well and that is what the miter saw slide makes possible.
There are many things to look for in shopping for the best miter saw and which miter saw you pick will depend largely on what you plan to do with the miter saw. If you are looking for a permanently bench-mounted miter saw in a woodworking shop, you dont need to concern yourself so much with size and weight. However, if you are planning to tote your miter saw to and from and around various job sites every day, size and weight will become very important as will a well-located carrying handle.
Most of the woodworking tools (except one) that we will review here are priced in the same neighborhood and so, if you are comparing models, price should not be a consideration with the exception of the Festool 10 miter saw. Festool stakes its reputation on top-quality and innovation in woodworking tools and charges accordingly. The Festool miter saw is an excellent miter saw if you have the money but so are the other contenders at far lower prices.
So, what are you going to be using your miter saw for? If you are just going to be making repetitive crosscuts into 2 x 4 lumber, any of these machines will suffice. You might, however, want to choose one with soft start and an electronic brake. If, on the other hand, you will be making critically accurate cuts into expensive hardwoods or crown molding, it would seem that accuracy, micro fine adjustment controls with digital LCD readout, large vertical height capacity and an excellent laser might top your list of requirements. Is the laser adjustable to left or right of the blade? One miter saw even features dual lasers, one down each side of the blade, clearly and accurately marking out the kerf the blade will make before the cut is made.
Other important considerations relate to bevel and miter adjustments. Look at how far, left and right, these adjustments can be made. Sometimes, 45 degrees just is not enough of an angle. Look how easily and accurately these adjustments can be made on each of these woodworking tools. Does the miter saw allow for micro fine adjustments? How many pre-set detents are there in both the miter and bevel scales? Can you make a cut near, but not exactly on a detent? Is there a miter detent override? Where are the controls and how do they work? Is everything within easy reach and easy to operate?
What kind of blade comes with the saw and what size is the arbor hole? If the answer is something other than 5/8 or 1, you may be locked into buying your blades from the saw manufacturer and you may well find better blades elsewhere. Usually, when I purchase a miter saw, I discard the blade and replace it with one that will make the smoothest, most accurate cuts possible like the Forrest Chopmaster. The extra expense is absolutely worth it if you are making critically accurate joints in fine hardwoods or crown molding. If you are only making rough cuts into Fir for framing, you might want to consider a blade with fewer teeth and a more aggressive cut.
How is dust collection accomplished with each saw? Does the port match the hose on your shop vacuum or will you have to depend on a dust bag? Will you have to buy a new vacuum that fits your miter saw? How much percentage of total dust made by your miter saw will your vacuum system and dust port remove?
Is the motor on the miter saw you are considering direct or belt drive? Does this miter saw have soft start, electronic speed control or variable speed? Is the miter saw motor large enough for the jobs that will be presented to it? How large is the miter saw table (for stability of large work pieces)? How much does the miter saw weigh (for portability)? How is the cord stored when the miter saw is being carried to the jobsite?
I have used several of these in my shop in recent years and I’ve been quite satisfied with them in general. While their light weight is a blessing, they are a bit tall (top heavy) for my liking. I have used these both as bench routers and in router tables and they have had more than adequate power for anything that I have thrown at them. I even used one to spin a half-inch spiral bit in a JDS Multi-Router and made dovetail joints, mortises and tenons with ease.
This wood router draws 12 amps and has a wide variable speed range of 8 to 25 thousand RPM. It features coarse and microfine depth adjustment, a tool-free template guide adapter and its precision centering design centers the bit precisely. It has a large 3 ¾” base opening plus a 2” sub-base opening so it can handle large bits. You can set the wood router motor in its base in either direction so that the on/off switch will be near either your left hand or right hand. This is possible because the router motor does not turn while being adjusted up and down.
Its ball-shaped, hardwood handles, while pretty, leave a bit to be desired in terms of grip and considering the height of this router, that’s important. Bosch has designed this wood router motor with a one-piece armature shaft for accuracy and long bit shank capability and has included Constant Response ™ circuitry to maintain constant speed under heavy loads. Included with this wood router are ¼” and ½” self-releasing collet chucks and a 3/8” collet chuck is available at extra cost. This Bosch wood router comes with two wrenches, a tool-free template guide adapter, a 10-foot cord and a chip shield.
DEWALT DW618 2 ¼ HP EVS WOOD ROUTER
The thing I like most about this wood router is its low profile (low center of gravity) and its comparatively light weight (10 Lbs.). This, along with the router’s rubber-coated oval (not round) handles mean you have firm control during critical cuts. Its 12 amp motor is more than adequate for most tasks and its electronic variable speed mechanism keeps the wood router spinning at a constant speed anywhere in a range from 8,000 to 24,000 RPM.
The microfine adjustment ring allows incremental height adjustments as small as 1/64 inch while raising or lowering the wood router vertically in its base. This wood router does not turn while going up and down, so the dust-free switch is always located in the same place relative to the handle grip. This means that you can easily turn the wood router on and off while hanging on tight to the machine.
A motor cam lock and quick release motor latches make gross height adjustments and motor removal quick and easy. This wood router comes with a sub-base concentricity gauge for perfect centering of template guides with relationship to the bit shank. It has a spindle lock so bit changes require only a single wrench. It’s clear, LEXAN sub-base lets you see the router bit while it is cutting. You can set the switch and cord set up for right or left-handed use.
MILWAUKEE MODEL 5616-20 2 ¼ HP BodyGrip® WOOD ROUTER
For the most part, I have used Milwaukee routers for router table applications simply because they tend to be a bit large and heavy for hand-held use. This wood router may be the exception to that rule because of its new, BodyGrip® feature which allows the operator to grasp the wood router firmly around its middle with either hand, while hanging on to the handle on the opposite side with the other hand. The grip also includes a hand strap so that the wood router can’t get away from you even if you lose your grip.
One thing I have always liked about laminate trimmers and small routers is that I could grip them around the middle which eliminates all chance of tipping during cutting. Notice the black knob at the upper left-hand corner of the router. This is the fine depth adjustment which moves the router motor via gearing and a threaded screw. If you want to release the router motor or make gross height adjustments simply operate the black lever visible along the left side of the router base.
The router sub-base contains a hole through which one can insert a 3/8” hex for “above the table” height adjustments in a router table. The geared microfine adjustment, the quick motor release lever and the “above the table” height adjustment make this an ideal wood router for all but the heaviest router table applications. And, the BodyGrip® feature makes this a good hand-held router as well!
PORTER CABLE MODEL 892 2 ¼ HP WOOD ROUTER
I hate to sound like a broken record but the height and weight (13 lbs.) of this Porter Cable wood router makes it potentially difficult to control. The oval, rubber-coated handles should help in this regard, however. With the electric cord up at the top of this skinny/tall wood router, you want to make sure that the cord is free to move with the wood router during a cut.
This wood router is soft-starting, has a 12 amp motor with electronic speed control and has a variable speed range from 10,000 to 23,000 RPM. The router motor transitions quickly from the fixed base (included) into the optional, extra cost, plunge and spiral bases that are available from Porter Cable.
The on/off switch is accessible from one of the handles and the router “locks off” electric power to the motor when you are changing bits. Only one wrench is required for bit changes because of the integrated spindle lock. Microfine depth settings are accurate to 1/128”. There is also a macro height lever for coarse adjustments and releasing the motor from the base.
SIDE-BY-SIDE COMPARISON CHART: WOOD ROUTERS
FEATURES
BOSCH
DEWALT
MILWAUKEE
PORTER-
CABLE
Model Number
1617EVS
DW618
5616-20
892
Approximate Online Price
$180
$160
$179
$200
1/2″ Collet
X
X
X
X
1/4″ Collet
X
X
X
X
3/8″ Collet
Available
Above Router Table Adjustment
Available
X
X
Base Type
Fixed
Spiral
Fixed
Fixed
Bit Changing Power Lock-off
X
Calibrated Depth Control Ring
X
Cam-lock Height Lock
X
Case
X
Chip Shield
X
Clear Sub-base
X
Detachable Cord Set
X
Dust-sealed Switch
X
X
Electronic Speed Control
X
X
X
X
Flat-top Design (For Bit Changing)
X
Handle Access On/Off Switch
X
Hardwood Handles
X
HP
2.25
2.25
2.25
2.25
Low Center of Gravity
X
Macro Height Lever
X
X
Micro Adjustment Knob
X
1/64″
1/64″
1/128″
Motor Amperage
12
12
13
12
Motor Contamination Shield
X
Motor Diameter
3.25″
3.5″
One-piece Armature Shaft
X
Padded Body Grip
X
Quick-Clamp Motor Release
X
Quick-Release Motor Latches
X
Right or Left-hand Switch
X
X
RPM Range
8000-25000
8000-24000
10,000-24000
10000-23000
RPM Variable
X
X
X
X
Rubber-molded Handles
X
X
X
Self-releasing Collets
X
Soft Start
X
X
X
Spindle Lock (One Wrench)
x
X
Sub-base Concentricity Gauge
X
X
Template Guide Adaptor
X
Two Wrenches
X
X
Weight
10.0 Lbs.
10.0 Lbs.
Not Stated
13.0 Lbs.
ALL ABOUT WOOD ROUTERS
The wood router is essential among woodworking tools because it adds decorative detail that enhances and defines the final appearance of your woodworking project. Used correctly, the wood router is to the woodworker what a fine paintbrush is to an artist. It’s all in the details. In this review, we will look at 2 1/4 horsepower routers from Bosch, DeWalt, Makita Tools, Milwaukee and Porter Cable.
There are four, basic types of wood routers on the market today: laminate trimmers, lightweight or low-powered routers in the 7/8 to 1 1/2 HP range, medium-powered routers in the 1 ¾ to 2 ¼ HP range and high-powered routers in the 3-4 HP range. Each has its use and I have owned all of them at the same time. The laminate trimmers do what their name implies as well as other light-weight tasks such as making hinge mortises. They are only suitable for small router bits but they are easily maneuverable and fit nicely right in your palm. If you need more horsepower but still like the ease of a lightweight router, the 7/8 to 1/12 HP routers will do a fine job of spinning router bits up to ½” radius round-over bits. Every shop should have one of these handy for bench-top work. They are a bit small for router table use. The 2¼ HP wood routers we will reviewed above have sufficient power to spin large router bits through hardwood and yet they are still light enough to be manageable as a bench-top wood router. While any wood router over 2 HP can be used in a router table, I prefer the high powered ones for that application because there is no need to worry about how heavy they are and you might as well have as much power handy as you might need. Most, but not all, of these large woodworking tools are plunge routers. The high horsepower is necessary to plunge large bits deep into hardwood to make mortises and the like.
If I could only afford one wood router, it would be the 2 ¼ HP variety because it is light enough for most bench-top work and can also be used in a router table. If I could afford two routers, I would probably have a 7/8 to 1 ½ HP wood router for bench-top work and a 3 ½ HP wood router under my router table. I don’t like mounting and dismounting routers under my router table, so having a lighter wood router on hand near the bench at all times really speeds things up.
Before we get into reviewing these routers , I’d like to make a few observations about these woodworking tools, in general.
First, I suggest you consider using only high-quality carbide-tipped router bits in your wood router whenever possible. They can be re-sharpened many times and they usually don’t burn up and load up if they are kept sharp. High-speed steel bits don’t last long, they are not worth sharpening and they dull quickly, burning your workpiece as they soon load up and turn black from burning. Sometimes, however, the bit profile you need may only be available in a high speed steel bit but this is the exception rather than the rule.
Second, as hand-held power woodworking tools, heavy and/or top-heavy routers are hard to manage. Not only will you be struggling with them all day, they tend to tip easily which can often ruin a cut or leave an incomplete cut. If a smaller, low-profile wood router could have spun that bit, then that is the wood router you should have been using. On the other hand, an under-powered wood router will not do a good job and may not even be safe. Also, be sure to check the weight of any wood router you may be considering, if it is to be hand-held. Heavy woodworking tools are tiring and clumsy to use all day long. A pound or two less can make a big difference.
Third, consider how you will be hanging onto the wood router while it is cutting. Are the handles comfortable enough for continuous use? Do the shape and material of the handles allow you to control the wood router properly. Some of the woodworking tools we will review today are also available with “D” handles (at extra cost) which may give you better control and feel. One wood router here even offers a padded grip around the exterior of the router base. One hand goes on the rubber grip while the other goes on a conventional knob.
Fourth, if your wood router is in the 2 1/4 HP range, like the wood routers reviewed here, you will want it to have a variable speed feature, especially if you are planning on using large bits like raised panel bits. You will need to run these large bits a bit slower. They will stay cooler and cut better at a lower speed. On the other hand, you will get smoother cuts with small bits of you keep the speed high. No matter what RPM you choose, you will want your wood router to be able to maintain that speed at all times, no matter how hard you push it. Electronic speed control allows your wood router to compensate for heavy loads by automatically adding a sufficient amount of extra power to keep your wood router spinning at the same speed it was before the cut began.
Fifth, (and this is a safety consideration) try to buy a wood router that has “soft” start-up. This would not be a needed feature in stationary woodworking tools but is an important safety device in a hand-held wood router. Historically, routers have had only one speed (high) and when you turn them on, they spin up quickly and the gyroscopic force of that can flip a spinning wood router right out of your hands. A soft start-up wood router gradually increases its speed from zero to full, thus eliminating almost all of the gyroscopic effect.
Sixth, if you are going to be changing bits all the time, consider what steps you will have to go through to accomplish that task. Some routers have a shaft lock button so you only need one hand to hold down the button and one wrench to turn the collet nut. I’m kind of used to the two-wrench variety. I usually take the router motor completely out of its base, lay it on its side on the table, putting one wrench on the flat part of the shaft and the other wrench on the collet nut. If I am loosening the collet nut, I will first lower the shaft wrench to the table top and then push down towards the bench with the wrench that’s on the collet nut. If I am tightening the collet nut, I will put the collet nut wrench down to the table top and then push down against that with the shaft wrench on the flat part of the shaft.
If you’ve used routers at all, you must have noticed that when you are loosening a collet nut, you will feel resistance at the start of the turn of the wrench and then it will turn freely for a while before resisting the wrench one more time. The first resistance comes from loosening the nut itself. The nut then unscrews a bit down the thread and then it begins to push against the collet, releasing it from the shaft of the router bit. When you are tightening a bit into a wood router, you will feel resistance only once as you squeeze the collet around the shaft of the bit while turning the nut as far as it will go.
Some people like to change router bits with the wood router upside down on the table with the two wrenches sticking out to the side. In this case, the technique is to arrange the wrenches so that you can squeeze their handles together with one hand to loosen, or tighten, the collet nut. For these people, some manufacturers make routers with flat tops. If find this way to be a bit more clumsy than laying the wood router down on the bench and there is less leverage in case of a stuck bit.
Seventh, router bits come in three shank sizes, 1/4”, 3/8” and 1/2”. The half-inch shank bits are only slightly more expensive than the quarter-inch ones and yet, they give you a distinct advantage. With a larger diameter shank and a larger diameter collet, there is much less chance of slippage under heavy loads. Consider buying only ½” shank bits, especially if you are spinning large cutters.
Eighth, some of these routers offer “above router table” height adjustment capability. This is usually accomplished by sticking a hex T-wrench into a hole provided. It’s hard to adjust the height of a wood router accurately from underneath a router table while on your knees, fighting gravity. An even more elegant solution is to purchase a router lift for your router table. If this interests you, check out my article on this site entitled “How to Build Your Own Router Table.”
Ninth, there are three types of wood router bases: conventional, spiral and plunge. In a conventional fixed base, the router motor just slides straight up and down in the base and is clamped into position. The spiral-type base has an adjustment ring that turns in a spiral groove cut into the outside of the router motor casing, thus raising or lowering the router motor relative to the base. A plunge router base clamps onto the router motor and then pushes the wood router and router bit down unto the work piece from above. Some routers are offered in kits containing two or more types of bases so that you only need to buy one router motor for a variety of uses.
Tenth, some of these woodworking tools gauge and control their fine depth-of-cut with a spiral ring while others utilize a geared shaft attached to a calibration knob. All routers have a means of making gross height adjustments by releasing the lever or cam that locks the router motor into the base. Once adjusted to a position close to the final position, the fine depth-of-cut adjustments can be made in increments as small as 1/64 of an inch and, in the case of one router reviewed above, 1/128 of an inch.
Eleventh, consider that motor amperage is usually a better indicator of motor power in woodworking tools than stated horsepower. All off the routers reviewed in this article claim to develop 2 ¼ HP but their amperage (electrical power used) varies from 11 to 13 amps.
Twelfth, and finally, there are some less important (to me) but nice features available on some, but not all, of these woodworking tools including: the availability of a 3/8” collet, an automatic motor power lock-off during bit-changing, a carrying case, a clear plastic sub-base for better viewing, a detachable cord set, a dust proof switch, a switch that can be located left or right for the comfort and convenience of the operator, oval, rubber-molded handles, self-releasing collets and a way to fine adjust the sub-base so that it is exactly centered around the bit shaft. This means nothing if you are only using ball bearing router buts but if you are using router guides mounted around the bit shaft, it is vitally important that the bit shaft be centered within the guide. If your bit is not perfectly centered when using template guides, your cut will move from side to side as you turn the router around while cutting. Since the guide is mounted to the sub-base, the hole on the center of the sub-base must be concentric with the router bit shaft.
Be sure to check out the SIDE-BY-SIDE COMPARISON CHART immediately below the reviews and abo0ve this article. If you know which features are most important to you, you will be able to quickly determine which of these woodworking tools is the best wood router for you.
What is a Festool Domino Joiner and why is almost every fine woodworker comparing it favorably to similar but very different woodworking tools? Suffice it to say that the Domino is one of those woodworking tools that defies comparison to other woodworking tools. Is it a biscuit joiner? No, but Im sure that its design concept sprang from that. Heres what a biscuit joiner does: It cuts out half-moon-shaped shallow mortises in the edges of boards to accommodate eye-shaped compressed wooden biscuits. The biscuit joiner cuts an indentical mortise into the mating edge of a second board in a glue-up and this mortise accommodates the second half of the biscuit.
Why use biscuits? Because glue joints sometimes have a habit of opening up over time and this biscuit joining process is supposed to insure that this does not occur in the middle of a dining table or solid cabinet door after it has been delivered and paid for.
So, while the joiner does a great job, it is really a kind of one-trick pony in the world of woodworking tools. If you try to use it for other kinds of joints, like, say, mating a table leg to an apron, you will be disappointed. The biscuit has tremendous lateral strength across its grain. Because it is highly compressed, when the glue hits it, it swells up like a sponge, filling the mortise tightly, making it almost impossible to pull it apart laterally after the glue dries. However, because it is so thin and small, it has very little strength other than lateral and can be snapped off if bending force is applied across its grain. When gluing a leg to an table apron or chair, a biscuit joiner is not your best choice of woodworking tools. A mortise and tenon joint, on the other hand, is.
If you have ever tried to do a tight-fitting mortise and tenon joint with just a hammer and chisel you know how time-consuming and frustrating this process can be: First, the mortise must be chiseled out to its final dimensions. The walls must be smooth and parallel and the bottom needs to be flat. The tenon must be cut precisely to fill the mortise tightly but smoothly. It must be flat and square on all sides and not a bit longer than the mortise is deep. You start with the tenon being too wide and thick for the mortise and then you carefully shave it down until it fits perfectly. If you go just a teeny bit too far in your shaving, you have a sloppy joint and you must throw out the workpieces and start over from scratch. NO!!
There seem to be two kinds of quality woodworkers out there: The first kind are those who are interested in doing things by hand, using old fashioned woodworking tools, no matter how long it takes or how hard it is… just for the pride that comes with a hand-crafted attempt at perfection. The other kind of quality woodworker wants an equal degree of perfection but also knows that time is money and there is now a much better, more accurate, less frustrating way to make a mortise and tenon joint. The Domino Joiner makes perfect mortise and tenon joints over and over again with ease, speed and efficiency. It can make them along flat or beveled glue joints. It can make table legs join to aprons like they were a continuous piece of wood. It can make chair legs mate perfectly to seats and cross bars mate neatly to legs. You can quickly make door frames, cabinet carcasses and picture frames that will stay strongly together virtually forever. Best of all, once the mortise and tenon joint is made, you cant tell it apart from one made the old fashioned way by an old-time craftsman with a hammer and chisel. In fact, it may look better.
Like a biscuit joiner, the Domino joiner does not make tenons because they are already made to exact size, ready to be inserted into the mortises made precisely by the Domino joiner. The tenons look somewhat like dominoes, hence the name. They are square on the ends but rounded on the side corners. They are scored along the edges to allow glue to escape from the mortise so that the tenon can go to almost the full depth of the mortise. Domino Joiner tenons are made in several, specific thicknesses, matched exactly to the particular cutting bit designed for that size tenon. Each tenon is nominally twice the depth of each mortise. The joiner makes identical mortises in the pieces to be joined so the tenons are just short of approximately 2 times the depth of each mortise to insure a tight fit along the shoulders of the joint.
Unlike a biscuit joiner, mortise and tenon joints made by the Festool Domino joiner have strength in all directions because the mortises are deeper and the tenons are stronger and larger than biscuits. The grain runs the length of the tenon, not across it like the biscuit and the tenon is usually thicker than the biscuit. The mortise made by a biscuit joiner is approximately ½ or less at its deepest part while the Domino tenons go far deeper and do so to a consistent depth across the floor of the mortise.
While the mortises made by the Domino joiner are cut tight to the thinner thickness dimension of the Domino tenon, they are cut a bit loose near the rounded corners so that they can allow for slight inaccuracies in the placement of the mortises and so that the workpieces can be shifted slightly during glue-up if need be. This is why they are called “floating tenons.”
The dominoes are rounded on the sides because the machine cuts mortises with round ends equal to the diameter of the cutter being used at the time. There are four different diameters of cutters available. Cutter bits last between 4000 and 15,000 mortise cuts depending on the hardness of the wood and if the mortises are being cut into side grain or end grain. The bits are carbide tipped and can be re-sharpened 1-3 times although it is probably easier to just buy a new bit. If you take your index finger and wave it left to right you can see how the Domino cutter works while it is spinning around at over 25,000 RPM. This means that, unlike a drill bit that is stuck in its own hole with no way to vent out the friction heat, the Domino cutter is freely cutting in open air which means that the bits last a lot longer because they are not overheating. The interval between sharpening or bit replacement is an important economic consideration when shopping for woodworking tools that are going to be used a lot.
I could go into great detail about how the Festool Domino Joiner is adjusted, how the cutters are changed, how the fence is angled to make mortises in beveled joints, how spring loaded locator pins let you make repetitive mortises along the opposing sides of a glue joint, about how the depth of the mortises are set to match the tenons being used, about how the fence is adjusted as to height to locate mortises precisely in the glue joint, etc., etc. etc. If you decide to add a Domino joiner to the list of woodworking tools you own, just know that it comes with an excellent instruction manual that will show you every possibility and technique in great detail.
This gem among woodworking tools works with you in elegant simplicity: Pick out the right tenon size for the job, install the proper cutter for that tenon size, set the mortise depth to half of the tenon’s nominal length and then push on the machine to plunge the mortise right where you want it.
At this point, all you really need to know is if you are ready, willing and able to buy this accurate and easy to use woodworking machine. “Ready”, in the sense that you have a legitimate need for such a device, “willing” in that you want to make a substantial investment into a specialty tool and “able” in that you have the financial resources to pay for it. This is a production tool as well as an accuracy tool. If you are not doing production work, you might not need it enough to justify the price tag. On the other hand, if accuracy and production efficiency are your primary goals, the Festool Domino Joiner may find a justifiable home in your workshop. Assuming that you have the money available to consider investing $700 in the joiner, plus the tenons, plus a matching Festool portable vacuum system, you might want to ask yourself how much you would actually use a specialized machine like this. The decision to buy or not buy woodworking tools always comes down to production and profit. Time is money. Quality is money. Quality delivered quickly, over and over again can make woodworking a profitable business. Woodworking tools that can deliver this production value are always worth the money. Old school perfectionists can be very proud of their hammer and chisel wizardry but they will never get rich because what they are doing is taking too long and time, my friend, is money.
In the end, it comes down to accuracy vs. money. There has been a lot of short-sighted chatter on the woodworking blogs about this joiner and it is almost always about how expensive it is. Festool entered the market a few years ago with a line of the highest quality, most expensive, most inventive, well-thought out woodworking tools imaginable. Its just like the auto industry. There are Hyundais and there are Mercedes. Both sell well in good times because they fill different needs. There are always customers for both of them. You simply need to identify what type of customer you are by knowing, in advance, what your needs are in terms of woodworking tools.
The Festool Domino joiner has been called the most significant tool development in years. It is one of a kind (for now). It does its job well: It is easy to use and delivers precise results quickly.
If you are a professional woodworker, making repetitive mortise and tenon joints by hand, would you jump at a chance to make many, many times the cost of the machine in terms of time saved and accuracy achieved easily? What kind of woodworker are you? What kind of woodworking equipment do you need to do what you do? Can you justify the expense or not. I cannot answer that question for you but Im willing to bet that, at this point, you can.
One warning: Owning this can be addictive. The Domino joiner is one of many fine woodworking tools made by Festool. It is almost guaranteed that if you purchase your first Festool, the second Festool will come into your life a lot sooner than you ever expected.
Festool also has a product-wide system of containers (called Systainers) to hold woodworking tools, attachments and supplies. You only need one Festool vacuum and one Festool hose to keep your shop practically dust and chip free because it fits all tools sold by Festool. Once youve bought a Festool vacuum and hose, you are in the Festool system, making it easier to justify the next Festool purchase. Clever, those German engineers!
Festool has clearly identified a marketing niche is comprised of fine woodworkers who know that the best woodworking tools, the most expensive woodworking tools, built to last usually end up being the most economical kind of woodworking tools in the long run because they keep doing the quality thing quickly over and over again. That adds up to production efficiency that justifies the cost.
If I had just one woodworking job to do, I would buy a cheap tool. I could later justify throwing it in a drawer and forgetting about it because its cost had already been justified. If I did the same job, over and over again, every day, for a living, Id want the best, most accurate, well-made tool I could find at any price.
FESTOOL DOMINO JOINER SPECIFICATIONS
Front fence tilts with detents at 0, 22.5, 45, 67.5 and 90 degrees.
Spring-loaded guide pins index Domino to make precisely located mortise cuts.
Friction pads keep Domino from slipping against workpiece during cut.
Height selection scale has stops at 16mm, 19mm, 22mm, 28 mm, 36 mm and 40mm.
Depth of cut scale has stops at 12mm, 15mm, 20mm, 25mm and 28mm to match tenon lengths.
QUICK NOTE: To buy any product reviewed below, click on the Buy Now button to go directly to the appropriate page on another secure site to get more information on that product and/or make a purchase. The “Bob’s Pick” logo below indicates which of the products below has earned Bob Gillespy’s highest purchase recommendation. Below the reviews is a SIDE-BY-SIDE COMPARISON CHART and, finally, an article by Bob Gillespie on important features to consider when shopping and why.
This heavy and powerful edge sander has a 3HP 220V single phase motor which runs at 1750 RPM and drives a 6 sanding belt at 3150 feet per minute. As on all of these edge sanders, there is a small end table next to the idler roller for sanding inside curves. Included with this machine is a quick release for belt tensioning.
The front table of the Delta 31-396 edge sander is made from cast iron and it moves up, down, in and out as needed by the operator. The head is adjustable from zero to 90 degrees with detents at zero, 45 and 90 degrees.
This edge sander features a spindle sanding attachment which includes 3 drums and collars of different sizes. The graphite sanding platen tilts from zero to 90 degrees. Belt size is 6 x 10⁸. The front table measures 35 3/8 x 12. The end table is 11 3/8 x 8 7/8. There is a 4 dust port. This edge sander weighs 500 lbs and has a street price of about $2463.
JET EVHS-80CS 6 X 89 HORIZONTAL/VERTICAL EDGE SANDER
This is a horizontal/vertical edge sander which means that the sanding head, sanding belt, platen and idler roller tilt together from the vertical position, as seen in the photo, all the way back to a flat position 90 degrees from the vertical position. In this mode, a fence (included) can be attached to the front table to facilitate sanding the bottom side of a work piece. This edge sander can sand at zero degrees, 90 degrees or anything in between. This enables the operator to create bevels and even compound miters with ease.
The belt tensioning and tracking adjustments on this edge sander are fairly easy. The platen is made out of precision ground steel. The front table moves up and down. There is a 4 dust collection port. The end table is adjustable vertically across the width of the belt.
Included with this edge sander are a miter gauge that runs in a track in the front table and a metal fence, mentioned above, for sanding in the flat position. Sanding belts used by this edge sander measure 6 x 89, a bit smaller than the Delta edge sander above. Platen length is just under 3 feet. The front table measures 32 x 7 and tilts 90 degrees. Belt speed is 3900 feet per minute. Machine weight is 256 lbs., about half of the previous machine and is priced around $1069.
The Jet OES-80CS is an oscillating edge sander designed to reduce heat, burning and build-up, thus preserving the life of your sanding belts. This edge sander features a quick release lever for the release and tensioning of sanding belts as well as a tracking control dial. The precision-ground steel platen is covered with graphite to reduce belt friction which also helps with the longevity of your sanding belts. The front table moves up and down but does not tilt. The sanding head and related parts do tilt, however, enabling the sanding of bevels and compound miters. This edge sander uses sanding belts measuring 6 x 89. Front table size is 32 x 7. The machine weighs in at 258 lbs and has a price tag of about $950.
Like all Powermatic machines, this edge sander has a hefty price tag justified by top quality and innovative features. It is an oscillating edge sander which means that the sanding belt travels up and down 3/4 of an inch, 24 times per minute. This minimizes burning and lengthens belt life. Sanding belts can be expensive and so, over time, the oscillating feature should pay for the extra cost over a non-oscillating edge sander. Belt speed is 3542 FPM.
The front table has a vertical travel range of 8″. It can tilt inwards five degrees and outwards 45degrees. It measures a generous 48″ long and 11 3/4″ deep and the end guards can be removed so that boards longer than 48″ can be edge sanded. The end table tilts 40 degrees in and 45 degrees out. Ihe end table is half circle with an 18″ radius. The cast iron platen is covered by a graphite pad to minimize heat build-up and thus lengthen belt life.
The 9″ wide belts used by this machine are 3″ taller than the 6″ machines above. This means that not only can you sand taller workpieces, you have more belt surface to use between belt changes. The sanding head pivots on a large shaft with sealed ball bearings. There are (2) 4″ ports for efficient dust collection. A minimum 1,100 CFM dust collector is required.
This edge sander is equipped with a magnetic starter for safety. Belt measurement is 9″ x 138 3/4″. The machine measures 83″ L x 32″ D x 50″ H. It weighs 800 lbs. and ships at 870 lbs. Street price is about $4390.
SIDE-BY-SIDE COMPARISON CHART:
EDGE SANDERS
DELTA 31-386
JET EVHS-80CS
JET OES-80CS
POWERMATIC
Approx. Price
$2463
$1069
$950
$4390
Motor HP
3HP/220V
1 ½HP/ 115V
1 ½ HP/115V
3 HP/220V
Belt Speed
3150 FPM
3900 FPM
3900 FPM
3542 FPM
Frt. Table moves
up,dn,fwd,bkwd
up & down
up & down
up & down
Adj. Head
yes
yes
yes
no
Spindle Sanding
yes
no
no
no
Belt Size
6 x 10⁸
6 x 89
6 x 89
9 x 138 3/4
Frt. Table Size
35 3/8 x 12
32 x 7
32 x 7
48×11 3/4
End Table Size
11 3/8 x 8 7/8
Not Stated
Not Stated
19 x 12
Dust Port
4
4
4
4
Weight
500 lbs.
256 lbs.
258 lbs.
800 lbs
ALL ABOUT EDGE SANDERS
Over the years, Ive told many people that, next to the table saw, my edge sander has been the most utilized of all the woodworking tools in my shop. That may be because my woodworking designs always seem to have a lot of curved surfaces incorporated into them. While it is true that an edge sander can sand long, straight edges, I use it to sand inside and outside curves far more often than straight edges. With an edge sander, I can even sand large, round table tops using a jig with a pivot pin in the center. (See woodworking article on that subject on this web site.) My machine uses 6 x 10⁸ sanding belts and has about a three-foot platen surface. Outside curves are sanded on the front table and inside curves on the end table using the curvature of the idler drum. My edge sander does not oscillate and neither the front table nor the platen can be tilted. Most of the machines reviewed here are less limited than that.My technique is to mark the final profile to be sanded with a pencil line on the workpiece and then cut just outside of that line by about one blade width with the band saw or a jig saw. If the work piece is too large to manage on the band saw, I use the jig saw (sabre saw) to make the cut. After that, I use the edge sander to bring the work piece down to its final dimensions.
An oscillating edge sander keeps the sanding belts from loading up and burning by constantly moving the sanding belt up and down with reference to the work piece. An edge sander with a tilting front table or a tilting sanding head allows you to sand bevels and even compound angles.
If youve used edge sanders much, you know that, at a certain point, the sanding belt is going to go, announcing its departure from this world with some scary rumblings followed by a loud bang. I have never been hurt by this but I have always jumped away from the machine at the first sign of trouble. One good way to keep this from happening is to make sure that your sanding belts are no more than 6 months old because the glue that holds the lap or butt joint together tends to dry out and weaken with time. When ordering sanding belts, keep this in mind. Ordering sanding belts in large quantities may not a bargain in the end if you are ordering more sanding belts than you can use up in 6 months. Butt jointed sanding belts will leave a smoother finish but lap joints are much stronger and less likely to come apart. Another explosion-avoidance technique is to, whenever possible, avoid sanding sharp, pointed edges that can tear into the sanding belt and rip it up. If your machine has a coating on the platen, such as graphite, that will help reduce the friction between the back of the belt and the platen which will reduce heat buildup that shortens the life of your sanding belts.
Dust collection on any edge sander is an absolute must and the dust collector must be large enough to handle any amount of sanding dust that might be created by your edge sander. If you dont already own a dust collector that can suck up at least 600 cubic feet of air per minute (or more) you will have to add the cost of that machine onto the cost of the edge sander. So, when considering the cost of an edge sander, make sure you are looking at the total cost, not just the cost of the edge sander itself.
QUICK NOTE: To buy any product reviewed below, click on the Buy Now button to go directly to the appropriate page on another secure site to get more information on that product and/or make a purchase. The “Bob’s Pick” logo below indicates which of the products below has earned Bob Gillespies highest purchase recommendation. Below the reviews is a SIDE-BY-SIDE COMPARISON CHART and, finally, an article by Bob Gillespie on important features to consider when shopping and why.
DELTA 17-959L 17-INCH LASER DRILL PRESS
Of the many Delta drill presses available, this particular drill press seems best suited for the professional (and amateur) woodworker because it is designed specifically for woodworking. Its ¾-horsepower induction motor is adequate for all woodworking applications. The laser pod on this drill press is fully adjustable. The 17-9591 is a re-designed model featuring a larger floor base than its predecessor for improved machine stability. The drill press table features a removable and replaceable table insert under the drill point. You can remove it to use large sanding drums and replace it when it gets full of drill holes. What makes this model stand out is the fact that its table tilts left, right or forward for drilling angled holes. With the ordinary flat table, you would have to build a jig on top of the table to hold your work piece at a consistent angle. There are twin T-slots to help tie down your jigs and drill press accessories such as hold-down clamps.
The Delta 17-9591 drill press features a generous 4 7/8 quill stroke enabling you to drill deeper than most other drill presses. It has a cast iron head to dampen vibration so that it is not transmitted to the drill bit. It has an integrated, adjustable (goose neck) task light which takes a standard light bulb. Its quill diameter of this drill press is 1 ¾, its speed range is 215 2750 RPM and it weighs 238 lbs. This Delta drill press is priced at about $579.
JET JDP-17DX 17 (16 ½ SWING) DRILL PRESS
This drill press has a ¾-horsepower TEFC single-phase motor which should be adequate for almost any woodworking task. Features include dual AC-powered lasers, a large 14 x 18 work table with twin T-slots and a specially designed lip for easy clamping around the edge of the table. The table has a removable insert. The spindle return spring is adjustable as to tension. The drill stop is clutch-type. You can mount the feed handles on either side of the press, which is a really nice feature for lefties. To change belt and pulley speeds, you flip up the hinged metal cover on top. For drilling into large finished projects, the maximum distance from the bottom of the chuck is 29 1/8 to the table and 49 to the floor. Speed range is 200 to 3620 RPM and there are 16 speeds to choose from.
The column diameter is 3 1/8, the base size is 11 1/8 x 19 5/8 and the machine weighs 209 lbs. Compared to many woodworking tools, this drill press stands out as being well-designed and reasonably priced for what it offers. This Jet drill press has a street price of around $510.
POWERMATIC 2800 PM 18 VS DRILL PRESS
Like all Powermatic woodworking tools, the Powermatic 2800PM 18″ drill press has top quality, smooth operation and features to die for. It also has a somewhat hefty price tag compared to the others reviewed here which is typical for Powermatic woodworking tools. That said, lets take a look at what you get for your money so you can decide if its worth making the jump.
This drill press features twin LED lights, mounted in the head that do not cast shadows, head-mounted twin AC-powered lasers that pinpoint the drill point, a 16 x 14 table with twin T-slots that expands to 16 x 26, when needed, to support large workpieces. The table tilts left or right 90 degrees with a positive stop at zero degrees. A large handle makes raising or lowering the table easy. An additional, unique feature that is included in the price of this drill press is an adjustable split fence with a dust collection port. A fence is essential to drill press production work so plan on buying or making one if you dont buy this one.
Speeds are easily changed from 400 to 3000 RPM with the Powermatic drill press, using a handle on the upper left side of the head. This means that you do not need to concern yourself with belt and pulley access. And, you can tell how fast or slow the machine is running by looking at a digital speed indicator right on the front of the drill press head. Also in the front of the head is a lighted on/off switch with a key.
Powermatic gives you a full horsepower of motor power which insures that this paragon of woodworking tools can handle everything that is presented to it. This is more than the other woodworking tools reviewed here.The drill press motor is single phase and can be run on either 115 or 230 volts AC. It is pre-wired for 115 volts.
The 5/8 chuck is keyless, the depth stop is quick-setting and the feed handles can be mounted on the left or the right for ease of operation no matter which handle you prefer to use. Spindle travel is 4 3/8 for deep drilling capacity. For drilling into assembled projects, the maximum chuck to table distance is 30 and the maximum chuck to floor distance is 46. The column diameter is 3 1/8, the base measures 11 7/8 x 19 5/8. The drill press weighs in at 287 lbs, and ships at 302 lbs. This Powermatic drill press has a price tag around $1000.
SIDE-BY-SIDE COMPARISON CHART: DRILL PRESSES
DELTA
JET
POWERMATIC
Street Price (approx.)
$579
$510
$1000
Motor HP
¾
¾
1
Motor Specs
Induction 115V AC
TEFC 115V AC
TEFC 115/230V
Throat Depth
17
16 ½
18
Table Size
18 x 14
18 x 14
16 x 14 / 16 x 26
T-slots
2
2
2
Rem. Table Insert
Yes
Yes
Yes
Table Tilt
L, R, FWD
None
L, R 0-90 degrees
Quill Stroke
4 7/8
4 3/8
4 3/8
Lighting
Goose Neck
None
2 LEDs in Head
Lasers
2
2
2
Speed Range
215 2750 RPM
200-3620 RPM
400-3000 RPM
No. of Speeds
Not Stated
16
Continuously Variable
Speed Change
Belt & Pulley
Belt & Pulley
External Lever
Speed Indicator
None
None
Digital on Head Front
Rev. Feed Handles
No
Yes
Yes
Floor Base Size
Not Stated
11 1/8 x 19 5/8
11 7/8 x 19 5/8
Fence
None
None
Split w/ Dust Coll.
Quill Diameter
1 ¾
Not Stated
Not Stated
Column Diameter
3.15
3 1/8
3 1/8
On/Off Switch
Front
Front
Front w/key, lighted
Chuck
5/8 w/ key
5/8 w/ key
5/8 keyless
Max Distance to Table
24 ½
28 1/8
30
Max Distance to Floor
44 ½
49
46
Weight
238 lbs.
209 lbs.
287 lbs
As background for the reviews above, Id like to point out that the purpose of a drill press is to drill consistent, straight holes accurately into wood, metal or plastic. The purpose of a drill press with a fence is to drill repetitive holes in a workpiece at a consistent distance from the edge of that workpiece. The purpose of a drill press with a fence and one (or two) adjustable stops is to drill holes at a consistent distance from one or both ends of multiple workpieces. The purpose of a drill press with a tilting table is to drill accurate and repeatable holes at an exact angle into the work piece. The purpose of an electric drill is to drill holes where using a drill press would be impossible or impractical.
There are many things to consider when shopping for a drill press such as motor size, table size and features, quill stroke, task lighting, laser availability, rotation speeds, ease of speed change, number of speeds, reversible feed handle (for lefties) and even the size of the base (for machine stability).
Each drill press above is designed specifically for woodworking, meaning that consideration has been given to table size and functionality and throat depth because, in general, woodworking projects tend to be larger in size than metalworking projects. Woodworking applications generally use higher speeds than metalworking projects. This is not to say that you cannot do metal work on your new woodworking drill press. You can. All of these machines have 5/8 capacity chucks. Two use chuck keys and one is keyless. 5/8 is probably large enough for any woodworking bit you might use.
With regard to motor size, experience tells me that ¾ horsepower is about the smallest size motor Id like to see on a drill press. Some drill press models that are not reviewed here sometimes try to get away with a ½-horsepower motor. There are times, especially at higher belt speed ratios, that a half horsepower motor will prove to be inadequate. A one horsepower motor (included with the Powermatic machine) would be nice but its probably not necessary.
All of these woodworking machines feature twin lasers that create cross hairs on the work piece to help you quickly locate the drill point on your workpiece. If you look at another drill press, not reviewed here, you may want to check and see if the lasers are AC-powered or battery powered because its a pain to lose your lasers right in the middle of a project and then have to go to the store for more batteries. The Delta, Jet and Powermatic woodworking machines reviewed here all offer 110v AC-powered lasers.
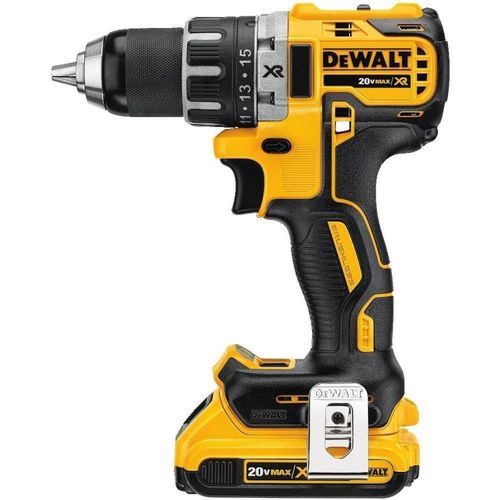
 The original cordless drill had neither a motor nor a battery. There was a hand drill in my father’s workshop long before he invested in an electric drill with a cord. The first battery-powered drill was the tool that started off the cordless revolution which eventually caused all sorts of tools to become available in cordless models. Some types of tools are more suitable to cordless use than others. Usually those tools that move around a lot in use and do not require large amounts of electricity are the best candidates for battery power. So, the electric drill, by its very nature, was the first tool to get a battery.
 When you are using a drill at many different locations, its a real pain to have to drag a cord around with you. At first, cordless drills werent very powerful and the batteries didnt last that long. For a while, that was an excuse for woodworkers to resist the upgrade to cordless. Todays cordless drills, especially in the 18 Volt class are both powerful in terms of torque and their lithium ion batteries are long-lasting. The new chargers are fast and so, with two batteries to switch off, its hard to run out of juice.
 Tool weight is important in a cordless drill or impact driver because these are tools that you hold out at arms length all day and while 5 to 10 pounds may not sound like much, each weight increase from drill to drill counts for a lot at the end of a long day on the job, even if your name is Hercules.
 Battery size, expressed in amp hours is another important consideration. All Lithium Ion, 18 Volt batteries are not alike in terms of size, weight or how long they will last between charges. That goes for battery chargers, as well. A half-hour battery charger, as opposed to a one-hour charger can make a real difference if you are constantly changing batteries on your cordless drill.
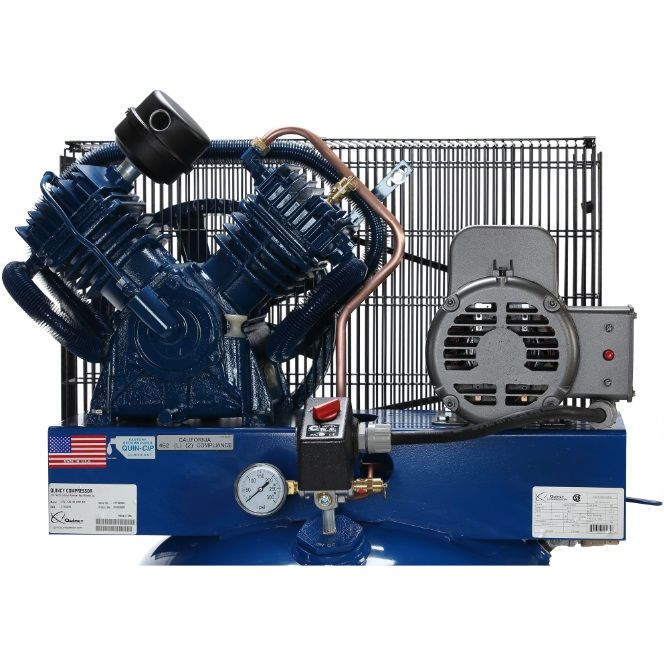
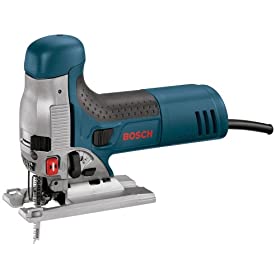
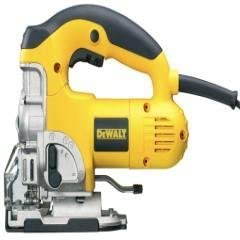
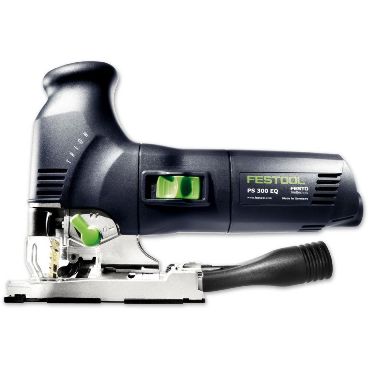
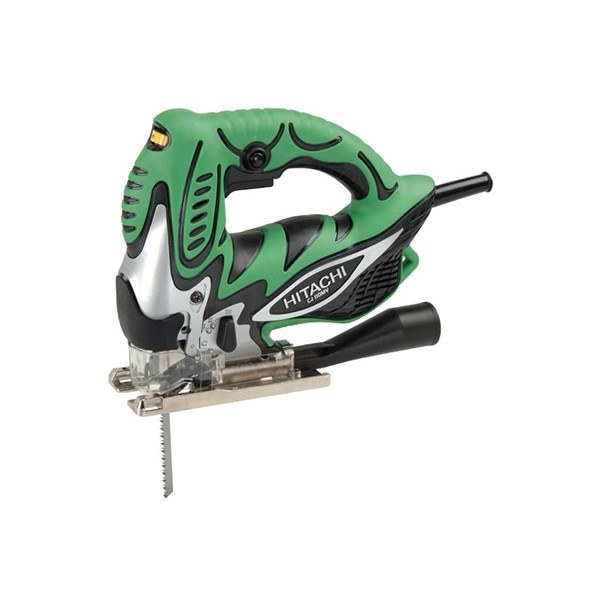
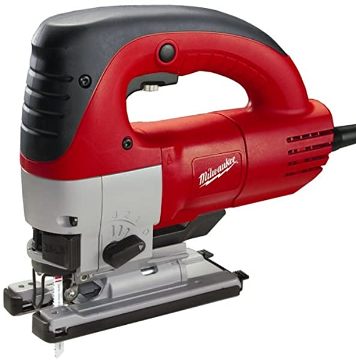

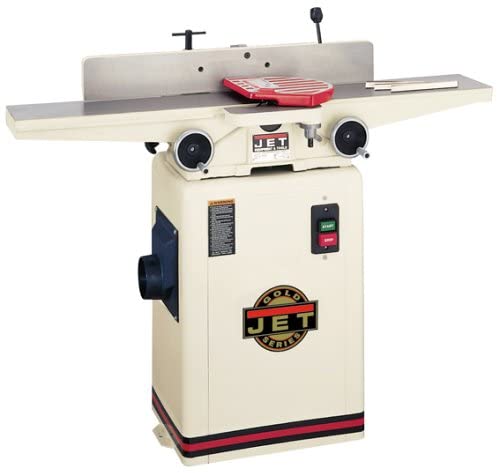


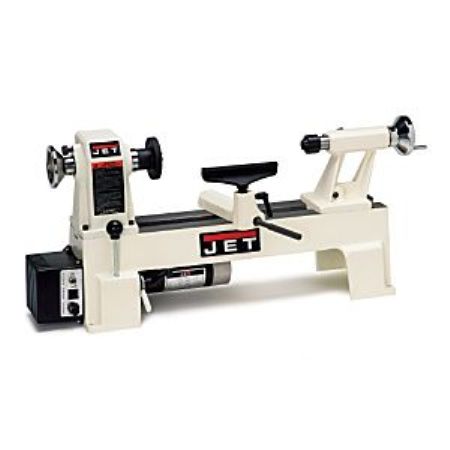
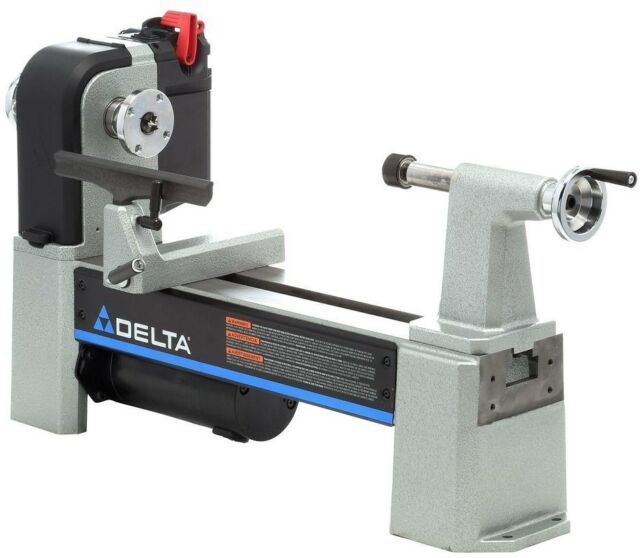
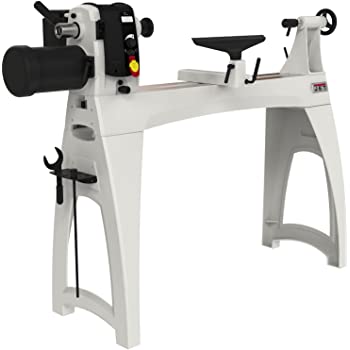
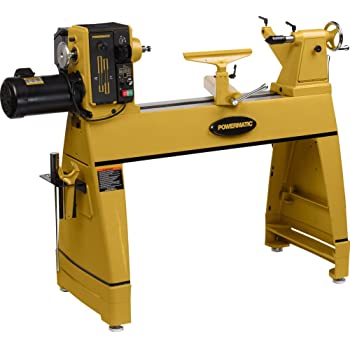
 from beginner to expert, I will try to keep my comments basic and yet complete. If you are an expert, please bear with me. If you are a beginner, this review may save you a lot of headaches at the school of hard knocks.
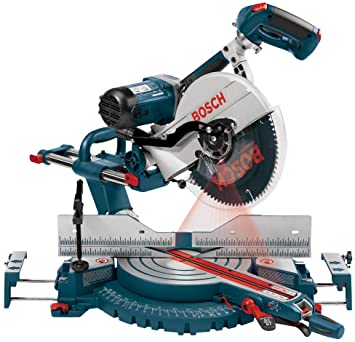
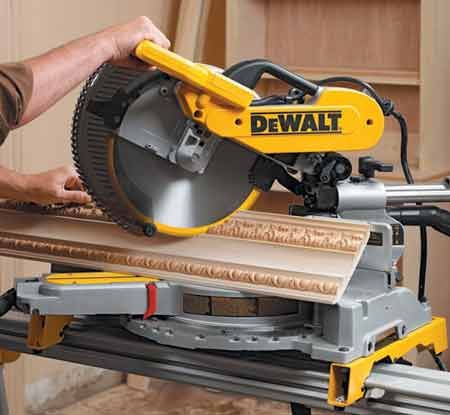
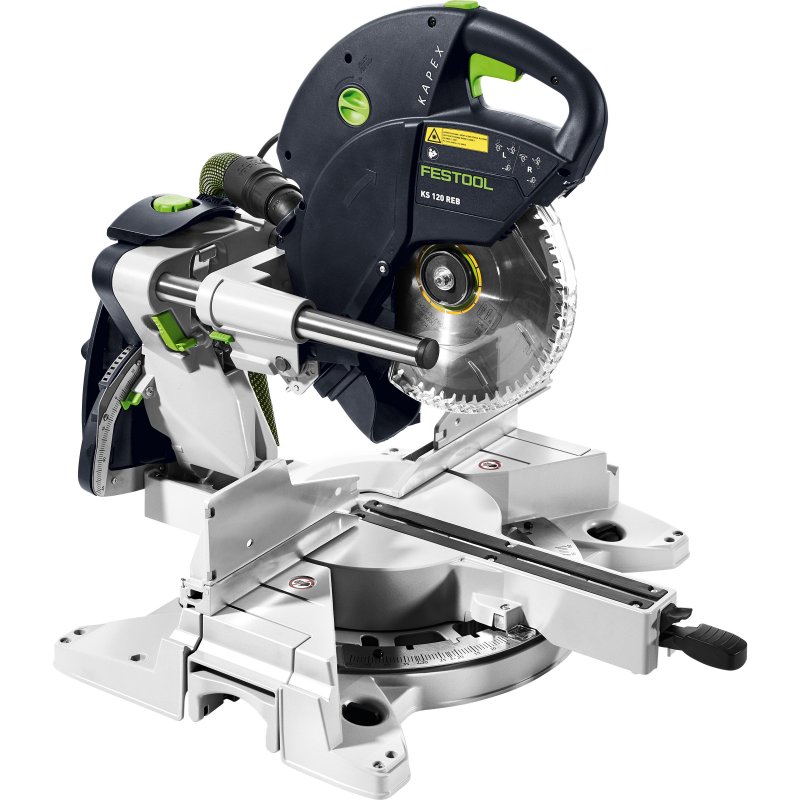
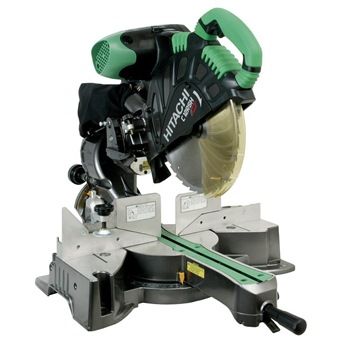
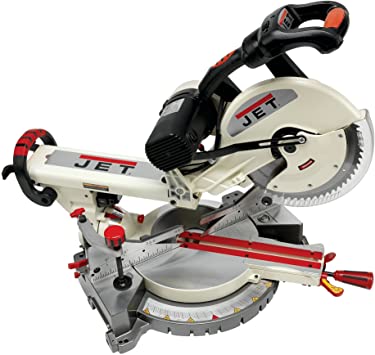
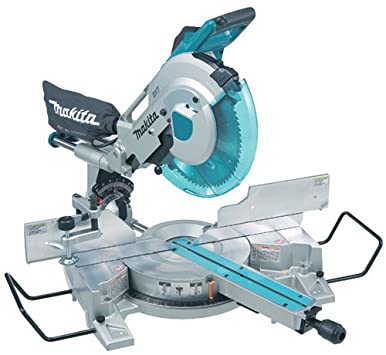
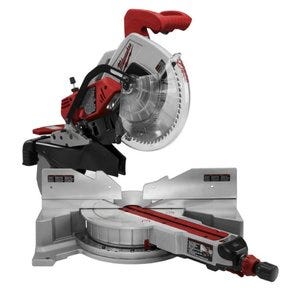
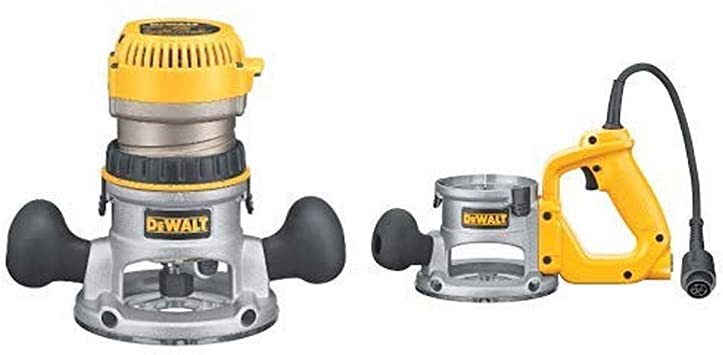
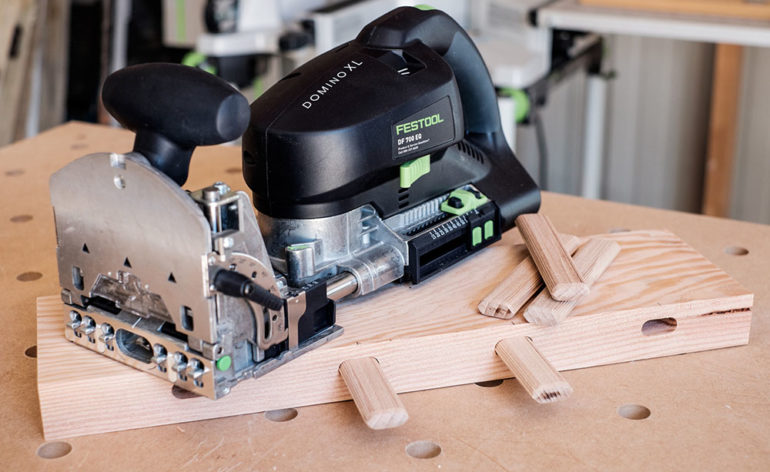
 This heavy and powerful edge sander has a 3HP 220V single phase motor which runs at 1750 RPM and drives a 6 sanding belt at 3150 feet per minute. As on all of these edge sanders, there is a small end table next to the idler roller for sanding inside curves. Included with this machine is a quick release for belt tensioning.